The cutest ornaments: Almond shell birds

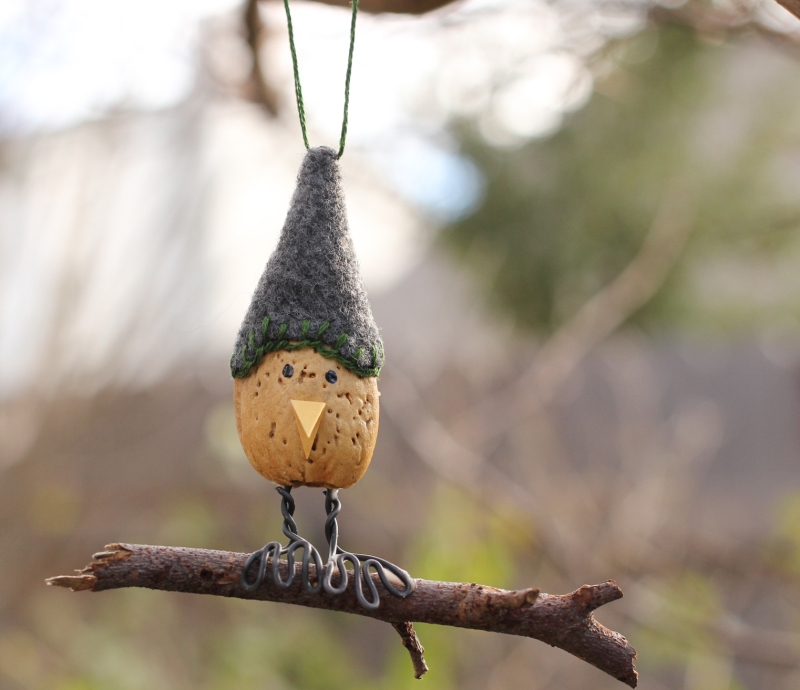
My handmade holiday ornaments for last year were these little almond shell birds, and they were a big hit. I followed the instructions pretty much line by line, but instead of shellac to seal my almond shells, I used a matte Delta Ceramcoat sealant that I had left over from a wood painting project. I made at least 10 of these little guys and am happy to have a few left over to hang on my tree this year.

We even held a little photoshoot for a few of them:

Almond_Bird_Ornaments-3


During the outside portion of the photo shoot, we were photo bombed by my favorite photo bomber. Do you see her?

Almond_Bird_Ornaments-5

Almond_Bird_Ornaments-4

Almond_Bird_Ornaments-6


Acorn jingle bell ornaments

Simple hand-embroidered ornaments

Hand-painted wooden ornaments

Beer cap ornaments

2014 Gifting: Leaf imprinted bowls

Every Christmas, I try to make one or two handmade gifts for my favorite people. One of those gifts is typically an ornament, which I will share with you in time to make your own during the next holiday season 🙂

However, I did make a gift that isn’t an ornament, and it is this polymer clay dish by Crafts Unleashed. It’s a small, decorative dish that could be used to hold some earrings or something similarly small. I basically followed the method in the post, but used a few different supplies. I bought white Sculpey clay III, which from the review seems to be a bit easier to work with than Premo by Sculpey. I also picked up a really cheap Sculpey clay tool set at Joann Fabrics for the cutting tools, but found that the little white roller worked better than a cheap rolling pin I bought at HomeGoods. The main thing I used the actual rolling pin for was to press the fresh leaf into the clay after it was flattened. The leaves came from a tree in our yard, and I used the ring from a glass jar as a circular cutout. I had a gloss clear coat from previous projects, and a bowl in our cupboard that I could use for this project and then dedicate for future craft projects. I’ve read that kitchen dishes should not be used for polymer clay projects. I made 10 dishes in total.

My supplies:

LeafBowls-1


Close-ups:

LeafBowls-4

LeafBowls-3 LeafBowls-2


A simple baby bib

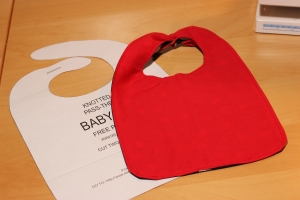
A friend recently had a baby boy, and to commemorate the occasion I wanted to make her a simple gift so I settled on a baby bib. This free pattern from Delia Creates was the perfect solution. I love the simple way it fastens – with a little knot that is pulled through a button hole. My friend’s baby shower was Nascar themed, and the baby’s namesake has to do with her alma mater, so I decided on a football theme for the bib in her university’s colors. I was lucky to find the helmet pattern and then used a solid red for the back of the bib. The pattern was easy to follow and went together quickly.

BabyBib-3  BabyBib-2

Hand stamped infinity scarf

Acorn jingle bell christmas ornaments


AcornOrnaments-3

I whipped up these simple Christmas ornaments as gifts for my friends and family. I had the grand idea that we would harvest local acorn caps to use, but they ended up being too small for the bells I found at Joann.


They were pretty simple to make. It went something like this:

  1. Find acorn caps to order on ebay since our local caps were too small.
  2. Paint the acorn caps with gold, green, and red glitter paint.
  3. After they dry, glue the bells into the acorn caps. I found hot glue to be the easiest to work with, but reinforced it with some Elmer’s in the gap around the bell, if it existed.
  4. After that round of glue dries, attach matching embroidery thread to the stem by tying it and then add a bit of glue for security.
  5. Once that dries, tie the thread onto a loop of ribbon. I varied the length of thread so that the bells would hang at different lengths.
  6. Optional – add a small coordinating bow to the ribbon loop.

And done!

AcornOrnaments-2

Enhanced by Zemanta

Recent projects: Boot cuffs and a neck cowl

I recently finished off two quick projects, one as a Christmas gift and one for myself. For my sister, I crocheted a set of boot cuffs after I attempted to buy her some last year on Etsy, a transaction that fell through. I found the boot cuff pattern on Ravelry. It was easy, just single and double crochet. I found a teal wool yarn to use, since that was close to the color I originally tried to order for her.

BootCuffs-2 BootCuffs-1


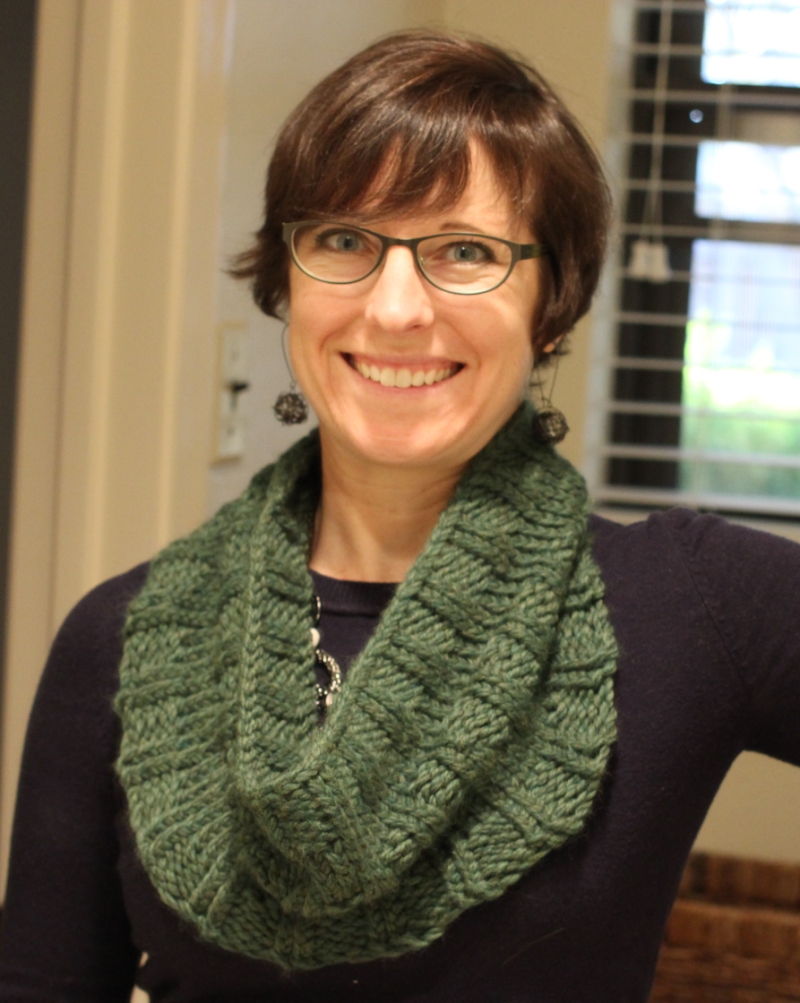
The second project was a neck cowl for myself. I get really excited about wearing scarves in the winter so I decided to make yet another one for myself. I found the pattern on Ravelry again. I ordered Forest Heather Biggo yarn from Knit Picks. The yarn is very thick, and the pattern calls for large needles, so it was a project that went fast also. The yarn is pleasingly soft.

RibbedCowl-1


My cat Annie decided to get in on the photo action.


RibbedCowl-2

I learned how to take my own photo in the mirror.

IRibbedCowl-3

Enhanced by Zemanta

Simple felt hand-embroidered ornaments

I’ve gotten into the habit of making ornaments each year to give to my family as gifts. Last year I made simple hand-embroidered felt ornaments after seeing this post from nini on Pinterest. Once I got started, I ended up making two kinds, one with 3 hearts like nini made and another with just 2 hearts.

Embroidered ornaments, one uses 3 hearts and the other uses 2 hearts.

Embroidered ornaments, one uses 3 hearts and the other uses 2 hearts.

To make these ornaments, I used the following supplies:

  • Off white felt fabric
  • Red embroidery floss and appropriate sewing needle
  • Red ribbon
  • Vanishing fabric marker
  • Paper to make a pattern, pins, scissors

The first step was to create my heart patterns. I made two different sizes for the two ornaments. I used the elementary school trick of folding my piece of paper in half and then drawing half of a heart and cutting it out to make sure that my patterns were symmetrical.

The two different heart patterns for the ornaments

The two different heart patterns for the ornaments

Next, I pinned down the hearts and cut the fabric.

Pinning down the heart pattern to cut the fabric.

Pinning down the heart pattern to cut the fabric.

I used the large pattern for the ornament with two hearts and the small pattern for the ornament with three hearts.

I used the large pattern for the ornament with two hearts and the small pattern for the ornament with three hearts.

Once the hearts were cut out, I used a vanishing fabric marker to draw the word I wanted to embroider on each heart. The ink vanishes quite quickly, so I drew each word right before embroidering.

Drawing the word before embroidering.

Drawing the word before embroidering.

Next, I used a simple backstitch to embroider the word.

Embroidered words for the ornaments.

Embroidered words for the ornaments.

For the ornament with two hearts, I matched them up and then did a simple stitch around the edges. I found it easiest to add the ribbon for hanging the ornament if I positioned the ribbon before I finished sewing the hearts together. I also used some scrap felt in the middle of the ornament to add a bit of “puff”.

Sewing the edges together.

Sewing the edges together.

One side of the larger ornament.

One side of the larger ornament.

Side two of the larger ornament.

Side two of the larger ornament.

For the ornament with three hearts, I sewed together the straight edges of the smaller hearts so that they formed a sort of triangle shape. I also used the red thread to to attach the three hearts at their apex and then looped the hanging ribbon around that thread. This also made it so that you don’t see the back side of each heart when you look at the ornament from the top.

Ornament using three hearts.

Ornament using three hearts.

The ornaments were well received by their recipients last year 🙂

Enhanced by Zemanta

A brain slug for a baby

I recently finished a knitted gift for our friend’s baby. It arrived in their hands only a day or two before his birth. Whew! I made a brain slug hat. What, you don’t know what a brain slug is??

Anyhow, I felt a geeky hat would be perfect for the baby of our friends. We also sent him things like periodic table blocks and a book called Calculus for Infants. Obviously, a brain slug would fit right in. I found the pattern on Ravelry.

I’m happy with the results, but I could never get the white knitted eye part to have the right shape. The instructions weren’t very clear so I ended up just using white felt and cutting out a shape that worked instead.

BrainSlug-3 BrainSlug-2 BrainSlug-1


Update! A picture of our friend’s baby wearing the brain slug. Apparently the hat should have been a bit wider. But what a cutie!

IMG_6503

Homemade lotion bars, great for dry skin!

I decided to venture into making body care gifts for my family this year. I wanted to try something they (and I) would actually use. I came across a few tutorials for making your own lotion bars, along with claims about how great lotion bars were for dry skin. After inspecting tutorials from One Good Thing and Being Frugal by Choice, along with a few others I’ve forgotten, I realized that they all used a ratio close to one part beeswax, one part shea / coconut butter, and one part oil. You can change the ratios and types of oils and butters as long as you keep it close to 1:1:1. If I make these again, I’ll probably grab some essential oil to give the lotion bars a light scent. Mine ended up smelling vaguely of coconut, which reminds me of suntan lotion.

The good news is that I’ve been using one of the bars for about a month and really like it. When you first hold it, it melts slightly in your hand, allowing you to rub it on dry skin. When you first rub it on it feels a bit oily but just few seconds later, it all absorbed and you’ve got moisturized skin.

My ingredients:

  • White refined beeswax from Dadant & Sons (Holds the oil and butter together, promotes absorption into the skin)
  • Shea butter from Whole Foods (Repairs dry skin)
  • Almond oil from Whole Foods (Nourishes, revives and promotes clear, soft, healthy skin)
  • Avocado oil from Whole Foods (Supports skin elasticity)
  • Coconut oil (or butter if you can find it) from Sprouts (Restores skin, combats damaging effects)

Tools needed:

  • Scale (you need to measure by weight, not volume)
  • Double boiler
  • Mini silicon mold
Ingredients for my lotion bars

Ingredients for my lotion bars


I had to guess about how much of the ingredients I needed to fill the silicon molds, so I started with 3 ounces of each ingredient set.

In the double boiler, I melted 3 ounces beeswax until completely melted, added the butter (2 ounces of shea butter plus 1 ounce of coconut) and once that was melted I added the oils (2 ounces coconut and 1 ounce avocado).

Melting the beeswax, adding the butter

Melting the beeswax, adding the butter

After everything was melted, I poured the mixture directly from the double boiler into my silicon mold because if you try to pour it into something with a spout to make this part easier, the mixture just hardens.

Lotion bars starting to cool in the silicon mold.

Lotion bars starting to cool in the silicon mold.

The bars harden completely in just a few hours, you can even put them in the fridge if you need it to happen quicker. Make sure your mold is clean and dry before pouring in the liquid lotion.

Lotion bars out of the mold

Lotion bars out of the mold

I didn’t have anything handy to package up the lotion bars, so I made little boxes out of card stock and wrote the ingredients and instructions on the bottom of the boxes.

Lotion bars in home made boxes, ready for gifting

Lotion bars in home made boxes, ready for gifting


Enhanced by Zemanta

Make your own wooden Christmas ornaments!

*This post was originally published in 2011 on Pretty Handy Girl and I’ve been saving it to share with you this year!*

Every year, I make some percentage of my gifts rather than buy them. At first I started out with grand ambitions and would pick one or two recipients to get a labor-intensive gift like a crocheted afghan. In the last few years, I’ve scaled my efforts back and now make small gifts for multiple recipients. I typically will make a handful of one style of gift to boost my holiday time efficiency.

This year I started thinking about what type of ornament I could make from materials I had lying around. I settled on ornaments made from branches we cut off our trees a few years back. Basically, I cut thin slices of the branches, added a painted Christmas design and a ribbon for hanging and they are ready to go!

So you’re probably wondering how you can do this too… Well, you’re in luck because I’m ready to share!

Step 1: Cut your wood slices

Find a branch with a diameter of 2 – 3 inches (or large enough to fit your design) and cut thin slices. I used a reciprocating saw with a 9” wood blade on it to cut slices about an inch thick.  I just have a photo of the saw, but remember to securely clamp your branch before starting to saw it and to wear safety glasses while operating the saw.

Step 2: Sand your wood slices

The reciprocating saw left a rough finish so I used sanding blocks to create a smooth surface. I first used a very coarse grain sandpaper to get the surface level and then a fine grain sandpaper to create a nice finish. The sanding blocks were very handy – I held the block still while moving the wood slice to sand the surface.

Step 3: Drill holes for small eyelets

This is as easy as it sounds. Use a small drill bit to drill a hole in the top of your wood sliced and then screw in a small eyelet. This will allow your gift recipients to hang your ornaments. You can pick up small eyelets at any home improvement store.

Step 4: Create your designs

I like to create my own linocuts (a print-making method) so I decided to create reproducible designs by basically making holiday stamps for my wood slices. You could also simply buy stamps or paint a design if cutting your own stamps isn’t your thing.

I started by drawing my designs on paper – a snowflake, a Christmas light bulb, and a Christmas tree. I traced the outline of my wood slices so that I would be sure to create designs that fit on the slices.

After that, I transferred the design onto my carving blocks.

And then I used my speedball cutter to carve out my designs.

Step 5: Get that design onto your wood slice!

Whether you make your own stamp, buy a stamp, or paint your design free hand, it’s now time to get the design on to your wood slice. Because two of my designs were meant to have two colors, I used a paintbrush to apply my paint to the stamp before stamping the wood slice. Of course, before doing any stamping I first tested my carved stamps to make sure they looked how I expected and also tested the amount of paint that need to be applied. The snowflake design only used a single color so I used a small brayer instead of a paintbrush to apply the paint.

I found that it worked best to lay the stamp on the table, place the wood slice on top of it, and press down with firm (but not hard) pressure. This helped transfer the paint to the wood even if some small ridges remained after the sanding step.

The trick is getting the right amount of paint on the stamp so I recommend practicing on paper for a while before moving on to the wood slices. If I painted the paint on too thick, I would first light place the stamp on paper to absorb some of the extra paint. Of course if you are just painting directly on the slices you can just jump to that step! I made one freehanded design of a snowman for a particular snowman lover in my life.

Step 6: Embellish your designs

Because I felt that my Christmas bulbs and trees turned out a bit plain, I broke out some leftover red glitter glue to embellish them. For the red bulbs, I painted on the red glitter glue. For the trees, I added little dots to signify tree decorations.

Step 7: Seal your ornaments

I wanted to add some sort of sealant coat to my ornaments for protection. I settled on Mod Podge because I had some at home. Experimentation taught me that I couldn’t use a sponge applicator to brush on the Mod Podge or it would smear the paint even though it was dry. Instead, it seemed that using a paint bush to dab the Mod Podge on top of the paint worked the best.  When first applied, it looks somewhat white but it does dry clear.

Before drying:

After drying:

Step 8: Add a way to hang those ornaments

I used ribbon to create a small bow at the top of the ornaments and also to create a loop so that the ornaments can be hung. Hooray! They are complete and ready to be gifted!

Enhanced by Zemanta

Dabbling with HDR photography

For those of you who’ve been reading my blog for a while, you’ve probably noticed the improved photos since January. My lovely husband surprised me with a DSLR camera, something that I’ve always wanted since my film SLR stopped working years ago. The new camera spurred me to take a photography class through UT Austin’s informal classes, as well as read some photo blogs and books. I latched on to the idea of trying high dynamic range (HDR) photography after seeing HDR photos in a variety of places. I know that professional photographers have mixed feelings about HDR, but for us amateurs it can really help bring out detail in photos that we would not otherwise capture. When we traveled to my husband’s family farm in Iowa over this summer, I knew I’d have the perfect subjects for HDR photos. The farm is over 100 years old, the farm house was built in 1927 and my father-in-law has a variety of old Ford tractors and old farm implements on display. See timstractors.com for more information on how he restores the tractors.

For the photos below, I used my big tripod, 5 stops for the HDR (-2, -1, 0, 1, 2), and Photomatix essentials to process the photo series. I tried to not go crazy with special effects.

The farm house, built in 1927.

One of the many Ford tractors brought back to its former glory by my father-in-law.

An old thresher, a farm implement that separates grain from the stalk and the husk.

An old Ford truck parked on the farm.

I picked up a collage frame and had a few photos printed to give to my father-in-law. I hope he likes it!

HDR photos of the farm ready to be gifted.

Creative Commons License
This work by Laura Feeney is licensed under a Creative Commons Attribution-NonCommercial-ShareAlike 3.0 Unported License.