
I decided to venture into making body care gifts for my family this year. I wanted to try something they (and I) would actually use. I came across a few tutorials for making your own lotion bars, along with claims about how great lotion bars were for dry skin. After inspecting tutorials from One Good Thing and Being Frugal by Choice, along with a few others I’ve forgotten, I realized that they all used a ratio close to one part beeswax, one part shea / coconut butter, and one part oil. You can change the ratios and types of oils and butters as long as you keep it close to 1:1:1. If I make these again, I’ll probably grab some essential oil to give the lotion bars a light scent. Mine ended up smelling vaguely of coconut, which reminds me of suntan lotion.
The good news is that I’ve been using one of the bars for about a month and really like it. When you first hold it, it melts slightly in your hand, allowing you to rub it on dry skin. When you first rub it on it feels a bit oily but just few seconds later, it all absorbed and you’ve got moisturized skin.
My ingredients:
- White refined beeswax from Dadant & Sons (Holds the oil and butter together, promotes absorption into the skin)
- Shea butter from Whole Foods (Repairs dry skin)
- Almond oil from Whole Foods (Nourishes, revives and promotes clear, soft, healthy skin)
- Avocado oil from Whole Foods (Supports skin elasticity)
- Coconut oil (or butter if you can find it) from Sprouts (Restores skin, combats damaging effects)
Tools needed:
- Scale (you need to measure by weight, not volume)
- Double boiler
- Mini silicon mold
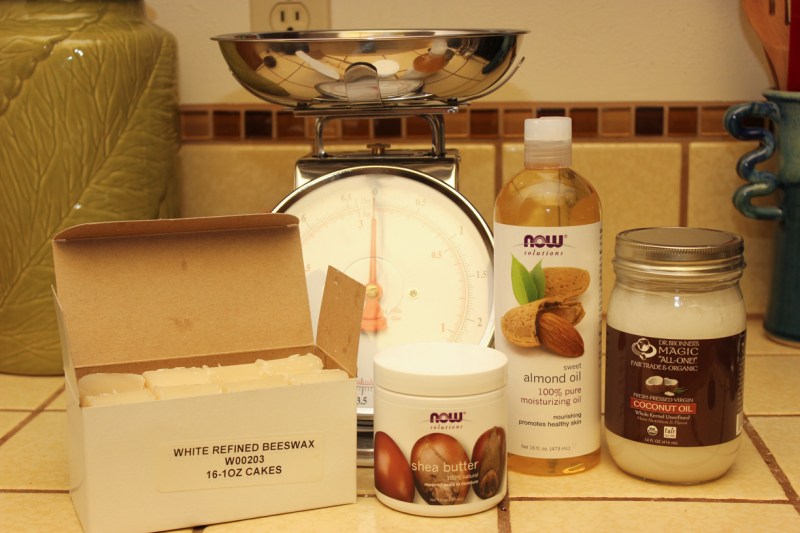
Ingredients for my lotion bars
I had to guess about how much of the ingredients I needed to fill the silicon molds, so I started with 3 ounces of each ingredient set.
In the double boiler, I melted 3 ounces beeswax until completely melted, added the butter (2 ounces of shea butter plus 1 ounce of coconut) and once that was melted I added the oils (2 ounces coconut and 1 ounce avocado).

Melting the beeswax, adding the butter
After everything was melted, I poured the mixture directly from the double boiler into my silicon mold because if you try to pour it into something with a spout to make this part easier, the mixture just hardens.
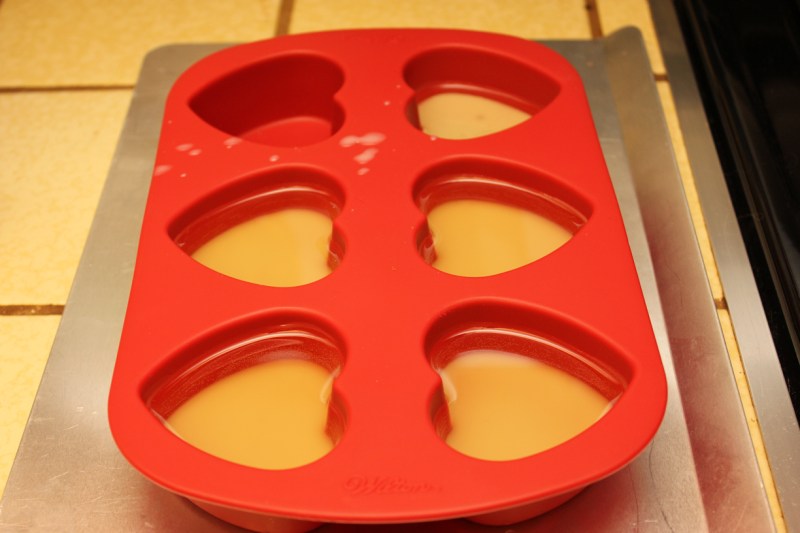
Lotion bars starting to cool in the silicon mold.
The bars harden completely in just a few hours, you can even put them in the fridge if you need it to happen quicker. Make sure your mold is clean and dry before pouring in the liquid lotion.

Lotion bars out of the mold
I didn’t have anything handy to package up the lotion bars, so I made little boxes out of card stock and wrote the ingredients and instructions on the bottom of the boxes.

Lotion bars in home made boxes, ready for gifting


2 thoughts on “Homemade lotion bars, great for dry skin!”