The start of an exciting project!

I’ve got plans for a natural wood end table that I picked up cheap from craigslist. I’m upcycling! It will be awesome, I promise. So far I’ve sanded it down to remove the coating and stained it darker to try to match the living room. Next up: sealing it. Then, the real exciting part that I can’t share yet. Stay tuned!

Sanded and ready to be stained:

After two coats of stain:

The stain I used is eco-friendly TimberSoy from Eco Safety Products. It’s easy to use and easy to clean up. No harsh chemicals involved!

Making tacos from left overs

Last week we made tacos from dinner from our taco cookbook. They were good. We ran out of filling before running out of tortillas so this evening I threw together some veggies we had lingering in the fridge to make a new taco filling. I guessed right because the new filling was delicious!

Process:

Slice up a sweet onion and a part of sweet potato into thin pieces and saute. After they are cooked, add handfuls of spinach and cook until wilted. Top with salsa and cotija cheese. Yum!

Filling:

Ready to eat, one sweet potato/onion/spinach taco and one taco from the taco cookbook:

Today’s hummus flavor is…

As you may remember from a previous post, I make hummus fairly regularly.

Today’s flavor is caramelized onion. The ingredients were chickpeas, lemon juice, a caramelized sweet onion, yogurt, a dash of olive oil, dash of kosher salt, dried thyme, parsley and oregano.  The onion gives the hummus a slightly sweet flavor that I enjoy.

Smoky beet cakes – a lucky new years food!

Link: Smoky beet cakes – a lucky new years food!

On New Years day I like to make us foods that are considered lucky. For some reason I decided that beets were lucky without actually knowing if that’s true or not. Really I just wanted to make this beet cake recipe. It was fun because of the food processor and the fact that I got to turn my hands dark red by forming beet patties.

I only have a picture of them with the rest of the food from that day. They were quite tasty and would even make good veggie burger patties!

Trying to replicate fat free ginger cookies

The Whole Foods near us makes these absolutely amazing fat free ginger cookies. The fat free-ness of the cookies is not the draw for me, but rather their wonderful texture – a bit firm around the edges and perfectly chewy on the inside. These cookies are not anything like ginger snaps. In fact, the cookies are so good that when I decide I want one and the store doesn’t have them I get kind of upset. Just ask my husband.

Before Christmas I decided to try to find a recipe for to make these cookies at home. Of course the internet delivered because others apparently have the same fetish for these cookies. They’re that good. Here’s the recipe from David Lebovitz that I used.

I’ve now made these cookies twice. If you read that recipe, I haven’t tried cooking down the applesauce, but I intend to next time. I also have not used the candied ginger. Instead, I just use a bit more ground ginger and cinnamon. I figure you can’t get enough of those delicious spices.

The first time I made them was when we were at my Mom’s house in Ohio for Christmas. They came out pretty well, although they were a bit softer than I wanted them to be after baked.

The second time was just this past weekend. This time, the dough wasn’t as sticky after being mixed up. I think it needed to be stickier. My guess is that the egg whites I used here were smaller than the ones I used at Mom’s (I think they were different sized eggs). Then I refrigerated the dough for more than a day so that probably made it even less sticky.

Once the cookies were done baking, they hadn’t spread out this time like they were supposed to. I had to take a cup and smash them so they were somewhat flat. Despite that, the texture of these cookies was better than my first attempt with the outside being firmer and the inside chewy. Because the cookies didn’t spread they are pretty small looking. Next time I will roll them into larger balls to start. I’ll probably also try adding a third egg white because we use smaller eggs at our house.

The dough after being mixed:

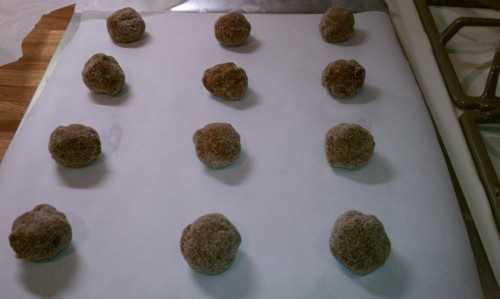
Making the balls and rolling them in sugar and cinnamon:

Ready for the oven:

Out of the oven and squashed by a cup:

And finally, the chewy center:

Making my own vanilla extract

I like to bake. I try not to do it to often because I REALLY like to eat what I bake. Luckily, we bring baked goods to work for co-worker’s birthdays so I can bake and share fairly often.

That means that I go through a lot of vanilla extract. Recently, I came across an article in an old print version of Craftzine (this link doesn’t work on mobile devices) that tells you how to make your own vanilla! Of course I had to try it. Supposedly you make so much that you can even give batches away as gifts.

The instructions in the magazine are pretty detailed so I won’t rewrite them all.

To prepare to make my own vanilla, I first purchased 1/2 lb of vanilla beans (planifolia) for super cheap at Vanilla Saffron Imports.

I also picked up a handle of Tito’s Vodka and a 4 oz bottle of Nielson-Massey Vanilla extract.

The ingredients:

The article recommends seeding your vanilla batch with good vanilla extract that you’ve purchased to make the process go faster. I did that, but only used half of my extract bottle and instead doubled the beans that I put in my jar.

My jar filled with 2 oz of vanilla extract, 12 vanilla beans split down the middle and then topped off with Tito’s Vodka:

After 4 – 6 weeks I should be able to pour some vanilla out of this jar for use in my normal baking exploits. Each time you do that, you can top the jar back off with vodka.  For now, I’ve stored the remainder of my vanilla beans with some sugar as the package recommends. Hopefully they’ll still be good when I need them for my next batch. I’ve not worked with vanilla beans before. I’ll let you know how this experiment turns out.

What to do with more kale?

So after making kale lasagna this week, we ended up with way more kale than we needed. I think we bought quadruple what the recipe called for and I used half of it in the lasagna.

Recently I’d seen recipes for something called “kale chips”. There are plenty of examples if you google it.  All of the recipes claim them to be very, very good.

Tonight, I put that claim to the test. The process:

  1. Clean and dry the kale. I used my salad spinner to dry it.
  2. Take out the ribs of the kale and tear it into pieces (2” is generally recommended)
  3. Coat with olive oil and spices. I used my olive oil cooking spray because it was easier to coat the pieces. It’s probably tastier with real olive oil. I sprinkled salt and paprika on the pieces. I also read about people using seasoning salt, parmesan cheese, red pepper flakes… etc.
  4. Spread in a thin layer on a baking sheet.Kale, prior to cooking
  5. Bake in a 350 degree oven. I read from anywhere from 10 to 20 minutes. I kept pulling it out to check on the crispiness because the kale should get crispy. I think my layer was too thick because some pieces were done way before others and I had to pull them out early.
  6. Eat away!

The result:

I found that the kale should be crispy, if you tried to eat it before it was crispy it was somewhat difficult to chew. The saltiness was nice if you are a person that likes salty snacks. You don’t really get too much of the kale bitterness after it’s baked.

I baked up an entire head of kale which was too much for two people in one night. We’ll see if it keeps until tomorrow!

Also, spoiling cats

Along the lines of my post yesterday about spoiling my dog, I thought I’d share how we spoil our cats.

Recently we renovated our living and dining rooms. In the process we’ve replaced some of our furniture. And now this is what the cats have:

How did we get to this point?

We had a stand-alone cat perch that Mojo loved to play one. It was leopard print colored and didn’t really match the new improved decor.

My husband suggested that we make cat shelves up the wall. Being the sucker I am (and recognizing the chance to get rid of the leopard print) I agreed! And then here’s what you do:

  • Buy some sturdy shelves and brackets at Ikea
  • Cut them to size for cats
  • Wrap a long 1” x 4” board with sisal rope (they love scratching sisal rope!)
  • Attach all to wall at reasonable intervals, all the way up to the vaulted ceiling
  • Sew not one but two cat beds and velcro them to the shelves
  • Feel great satisfaction when you find cats sleeping up there. Ok, so really only Mojo goes up unprompted but if you lure Carston up he’ll lay there. Annie doesn’t go up at all. I blame her lack of claws.

Spoiling my dog

My dog has a ton of toys. She takes great care of them and never ruins them. She has enough that I have to swap out batches of toys because they don’t all fit in the toy basket. Eventually I donate them to the shelter. Despite that, I continue to make her this one type of toy that she likes: a braided fleece rope. I once bought a simple fleece rope at PetSmart and found out she really liked it.  After that, I collected fleece scraps when they were on sale and have made many, many fleece ropes for my dog and other dogs I fancy. She doesn’t play tug too much but she does like to carry around the fleece rope and slowly will chew on it (or it gets ruined when another dog comes to visit) so I have to make her new one.

Here’s how I make them:

  1. Cut three long strips of fleece (make them thicker for a thick braid)
  2. Tie one end in a tight knot
  3. Braid to the other end, tie in a knot
  4. Tie a knot in the middle
  5. Optional: tie extra small fleece scraps near the ends of the rope (I used to do this because the toy at PetSmart had them, but don’t do it any more)
  6. Give to your favorite spoiled dog. Seriously, it’s that easy.

A posed picture of Molly with a fleece toy on top of one of her new beds:

(This is her “window” bed that I felt the need to make after we removed the carpet from our house this winter. I didn’t want her to be cold while laying with her head on the windowsill! Also, the cats really enjoy it.)

Making kale lasagna

I must admit, I’ve always loved lasagna. However, I really only love lasagna in the style that my mom makes because I don’t like ricotta cheese. That’s why I never order it at a restaurant. For this week’s dinner I decided to adapt a Kale Lasagna Diavolo recipe from my January / February 2011 issue of Vegetarian Times magazine since kale is in season and gorgeous (not to mention delicious) this time of year.

The recipe didn’t have nearly enough vegetables in it for my liking, so I added mushrooms and onions. To make the lasagna more to my taste, I used small curd cottage cheese instead of ricotta cheese (my mom’s style) and an Italian Mix of cheese instead of goat cheese (local varieties are not really available this time of year). Instead of tomato paste I used a combination of canned tomatoes and pasta sauce. This was also the first time I’ve ever made lasagna with actual lasagna noodles. Mom always uses rigatoni noodles since they are way easier to deal with. Using lasagna noodles wasn’t as bad as I expected.

It went something like this:

  • Clean and chop kale, removing it from the stems
  • Boil it in salted water for two minutes, drain and rinse

  • Saute 3 minced cloves of garlic, a sliced yellow onion, and a double package of sliced mushrooms in a bit of olive oil (I also use the olive oil cooking spray to cut calories)
  • After they are semi-cooked, add a can of tomatoes and continue cooking. Optionally, add red pepper flakes and black pepper. The idea was to cook down the tomatoes so there wasn’t so much liquid but it didn’t work that well. I guess that’s why the original recipe called for tomato paste

  • Next up: Cooking 9 lasagna noodles according to directions
  • Spray a casserole pan, spread a thin layer of spaghetti sauce and then lay down 3 noodles
  • Spread some cottage cheese and shredded cheese. Put down half of the kale and half of the mushroom/onion/tomato mixture. Spread some more spaghetti sauce.
  • Lay down 3 more noodles. Lay down more cheese. Use up the rest of the kale and mushroom/onion/tomato mixture (lesson learned: don’t use all the liquid from that mixture). Spread spaghetti sauce.
  • Lay down the last 3 noodles. spread a thin layer of spaghetti sauce.
  • Cover with foil, bake for 40 minutes at 400 degrees. About 5 minutes from the end, sprinkle more shredded cheese on top if you like.

I’d show you a picture of a slice of lasagna, but it ended up with lots of liquid and kind of went everywhere on the plate. Despite that I think this was the best lasagna I’ve ever made.  The kale has a great texture and all the flavors came together wonderfully. And on top of that, it’s incredibly healthy and low in calories! The recipe quotes 180 per serving but as I’ve adapted it, who knows where it stands.