Saint Martin day 5: a tour of Marigot and and afternoon at Baie Rouge

Wednesdays and Saturdays are market days in Marigot so we decided to take our walking tour of the city then. We walked along the water front and explored the colorful stalls, eventually buying some interesting infused rums from a vendor.   

One end of the market area has nice buildings that house a fish market on some days, just not this day.


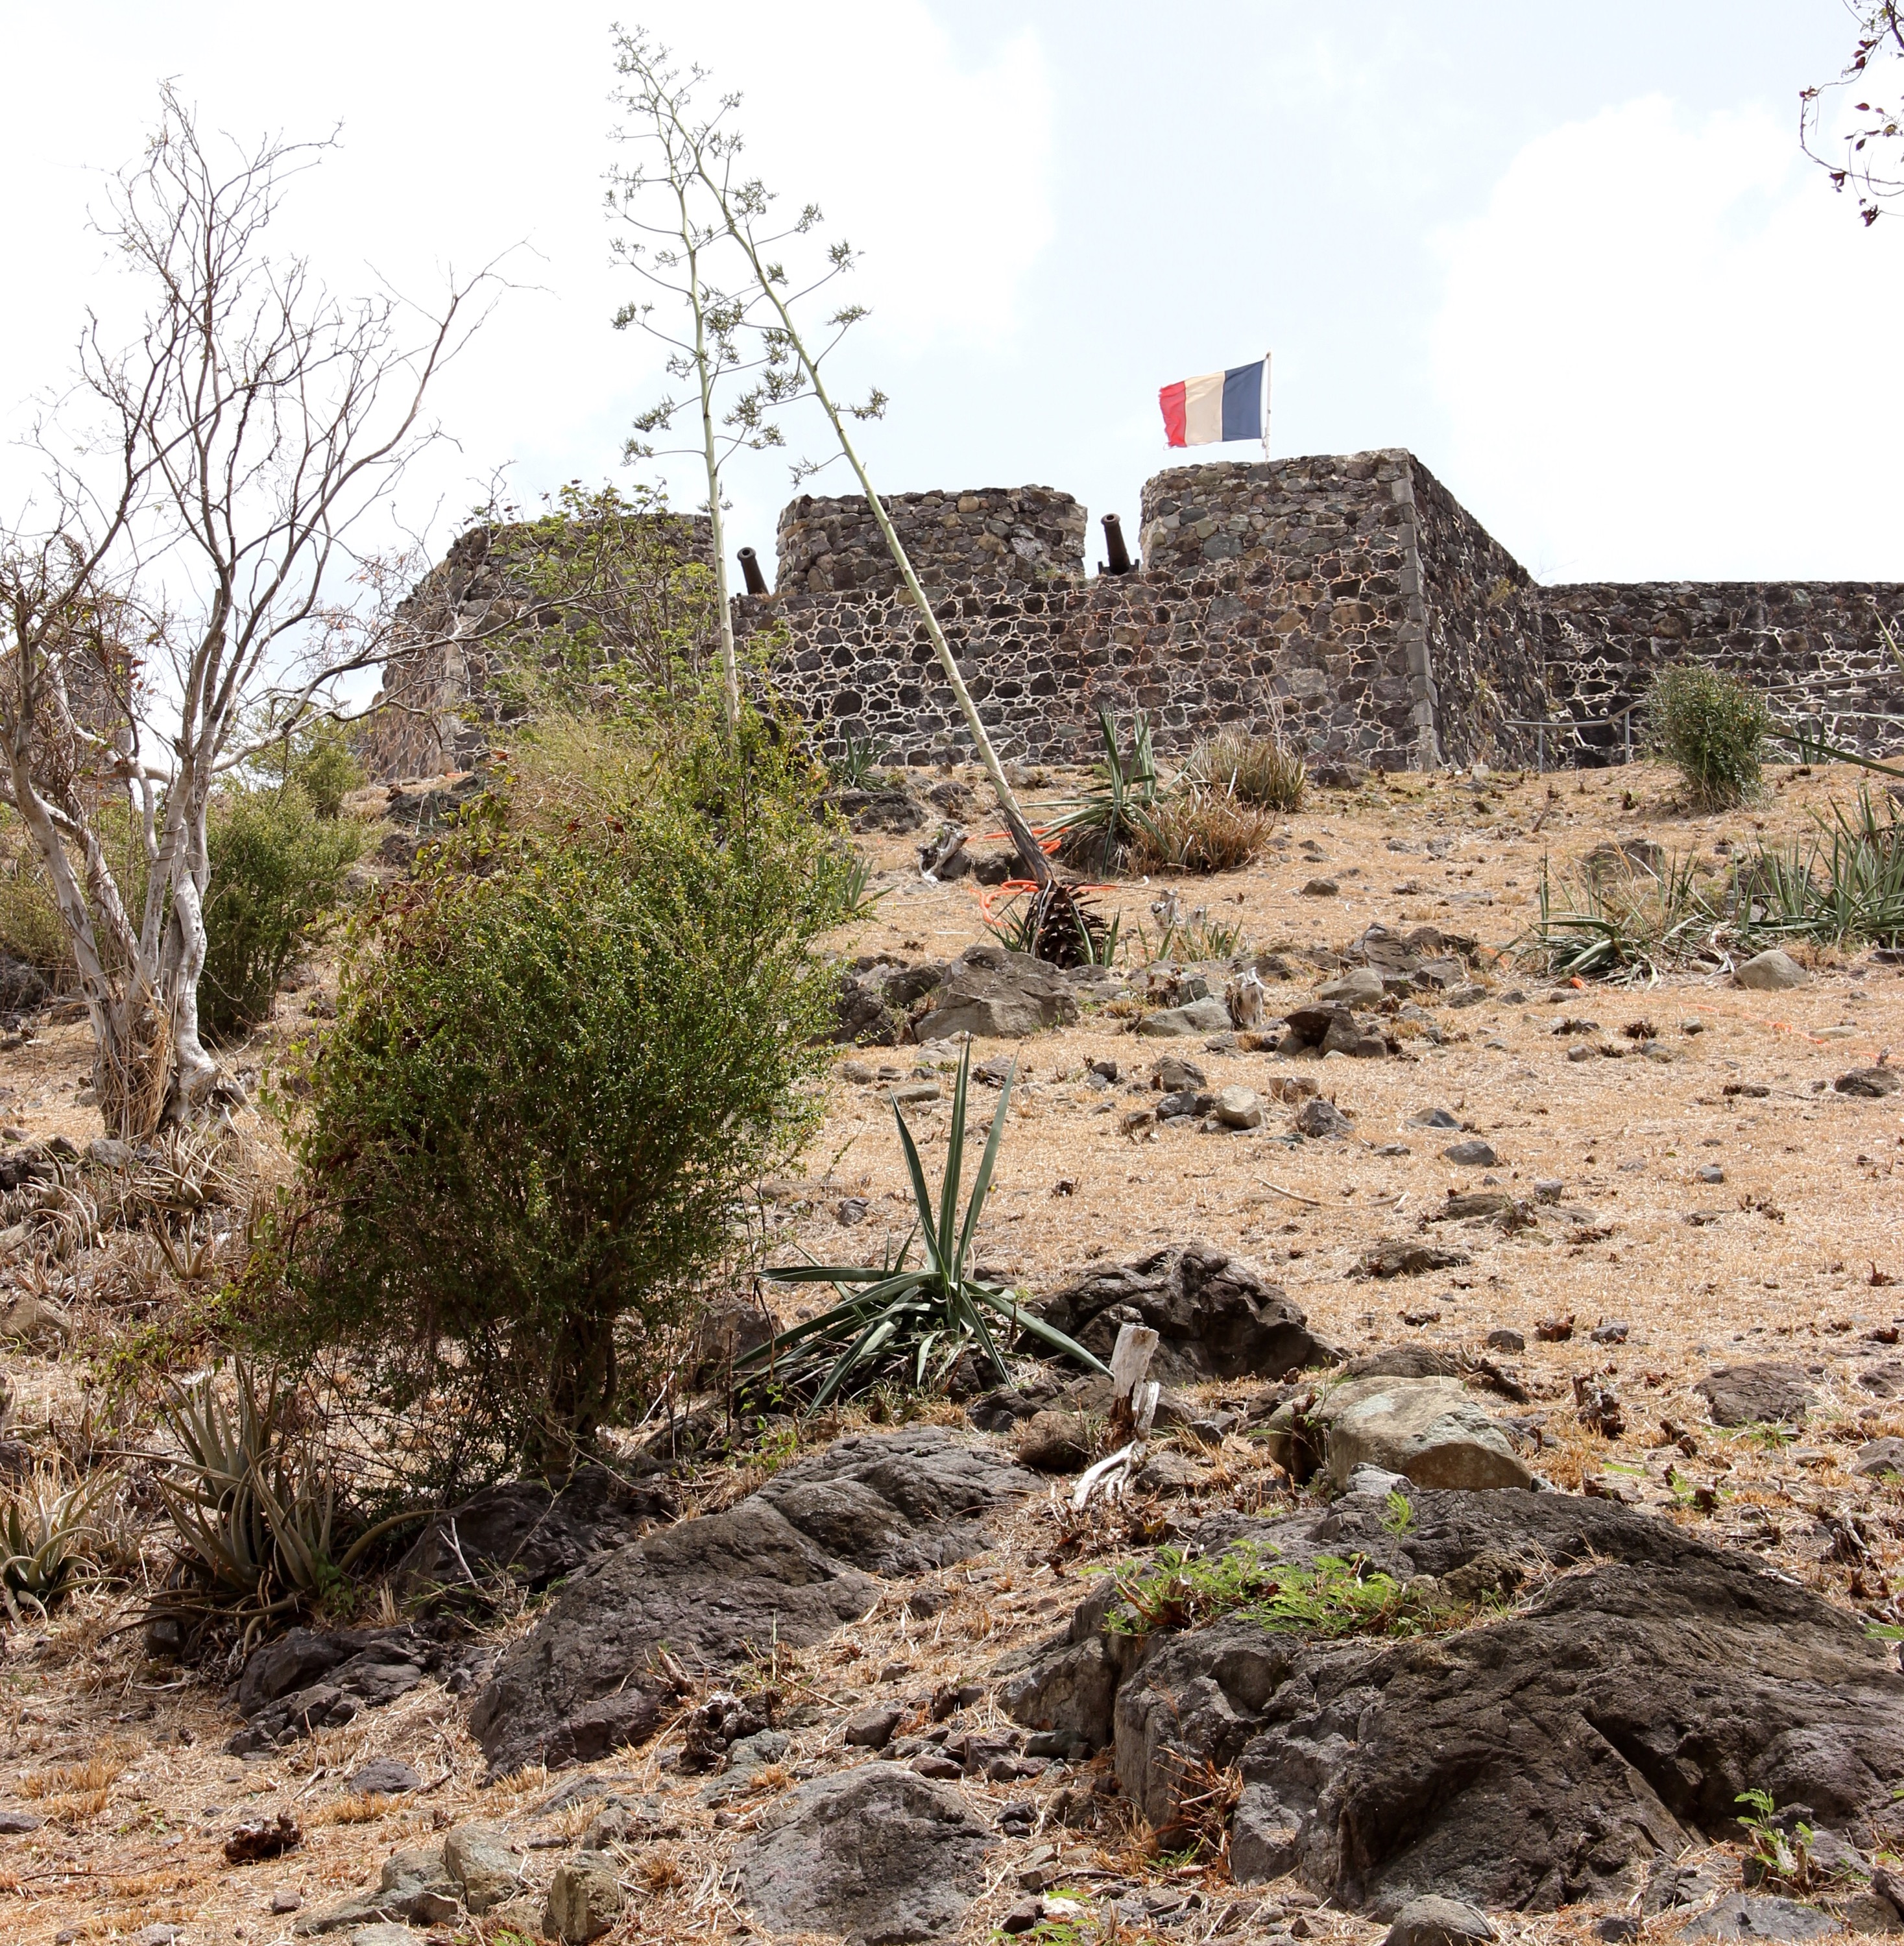
After walking around on the main streets of Marigot, we took the 92 steps up to Fort Louis. Don’t worry it was not near as strenuous as it sounds. The fort was built in 1789 by the French. It has not been well maintained, but it is free to walk around on and has great views.


The colorful tents are the market:


After walking the town a bit more we headed to Baie Rouge for lunch, beach lounging, and snorkeling. I like the large smooth rocks on the edge of the surf. We had a lovely fish sandwich on fresh bread from chez Raymond.  
 

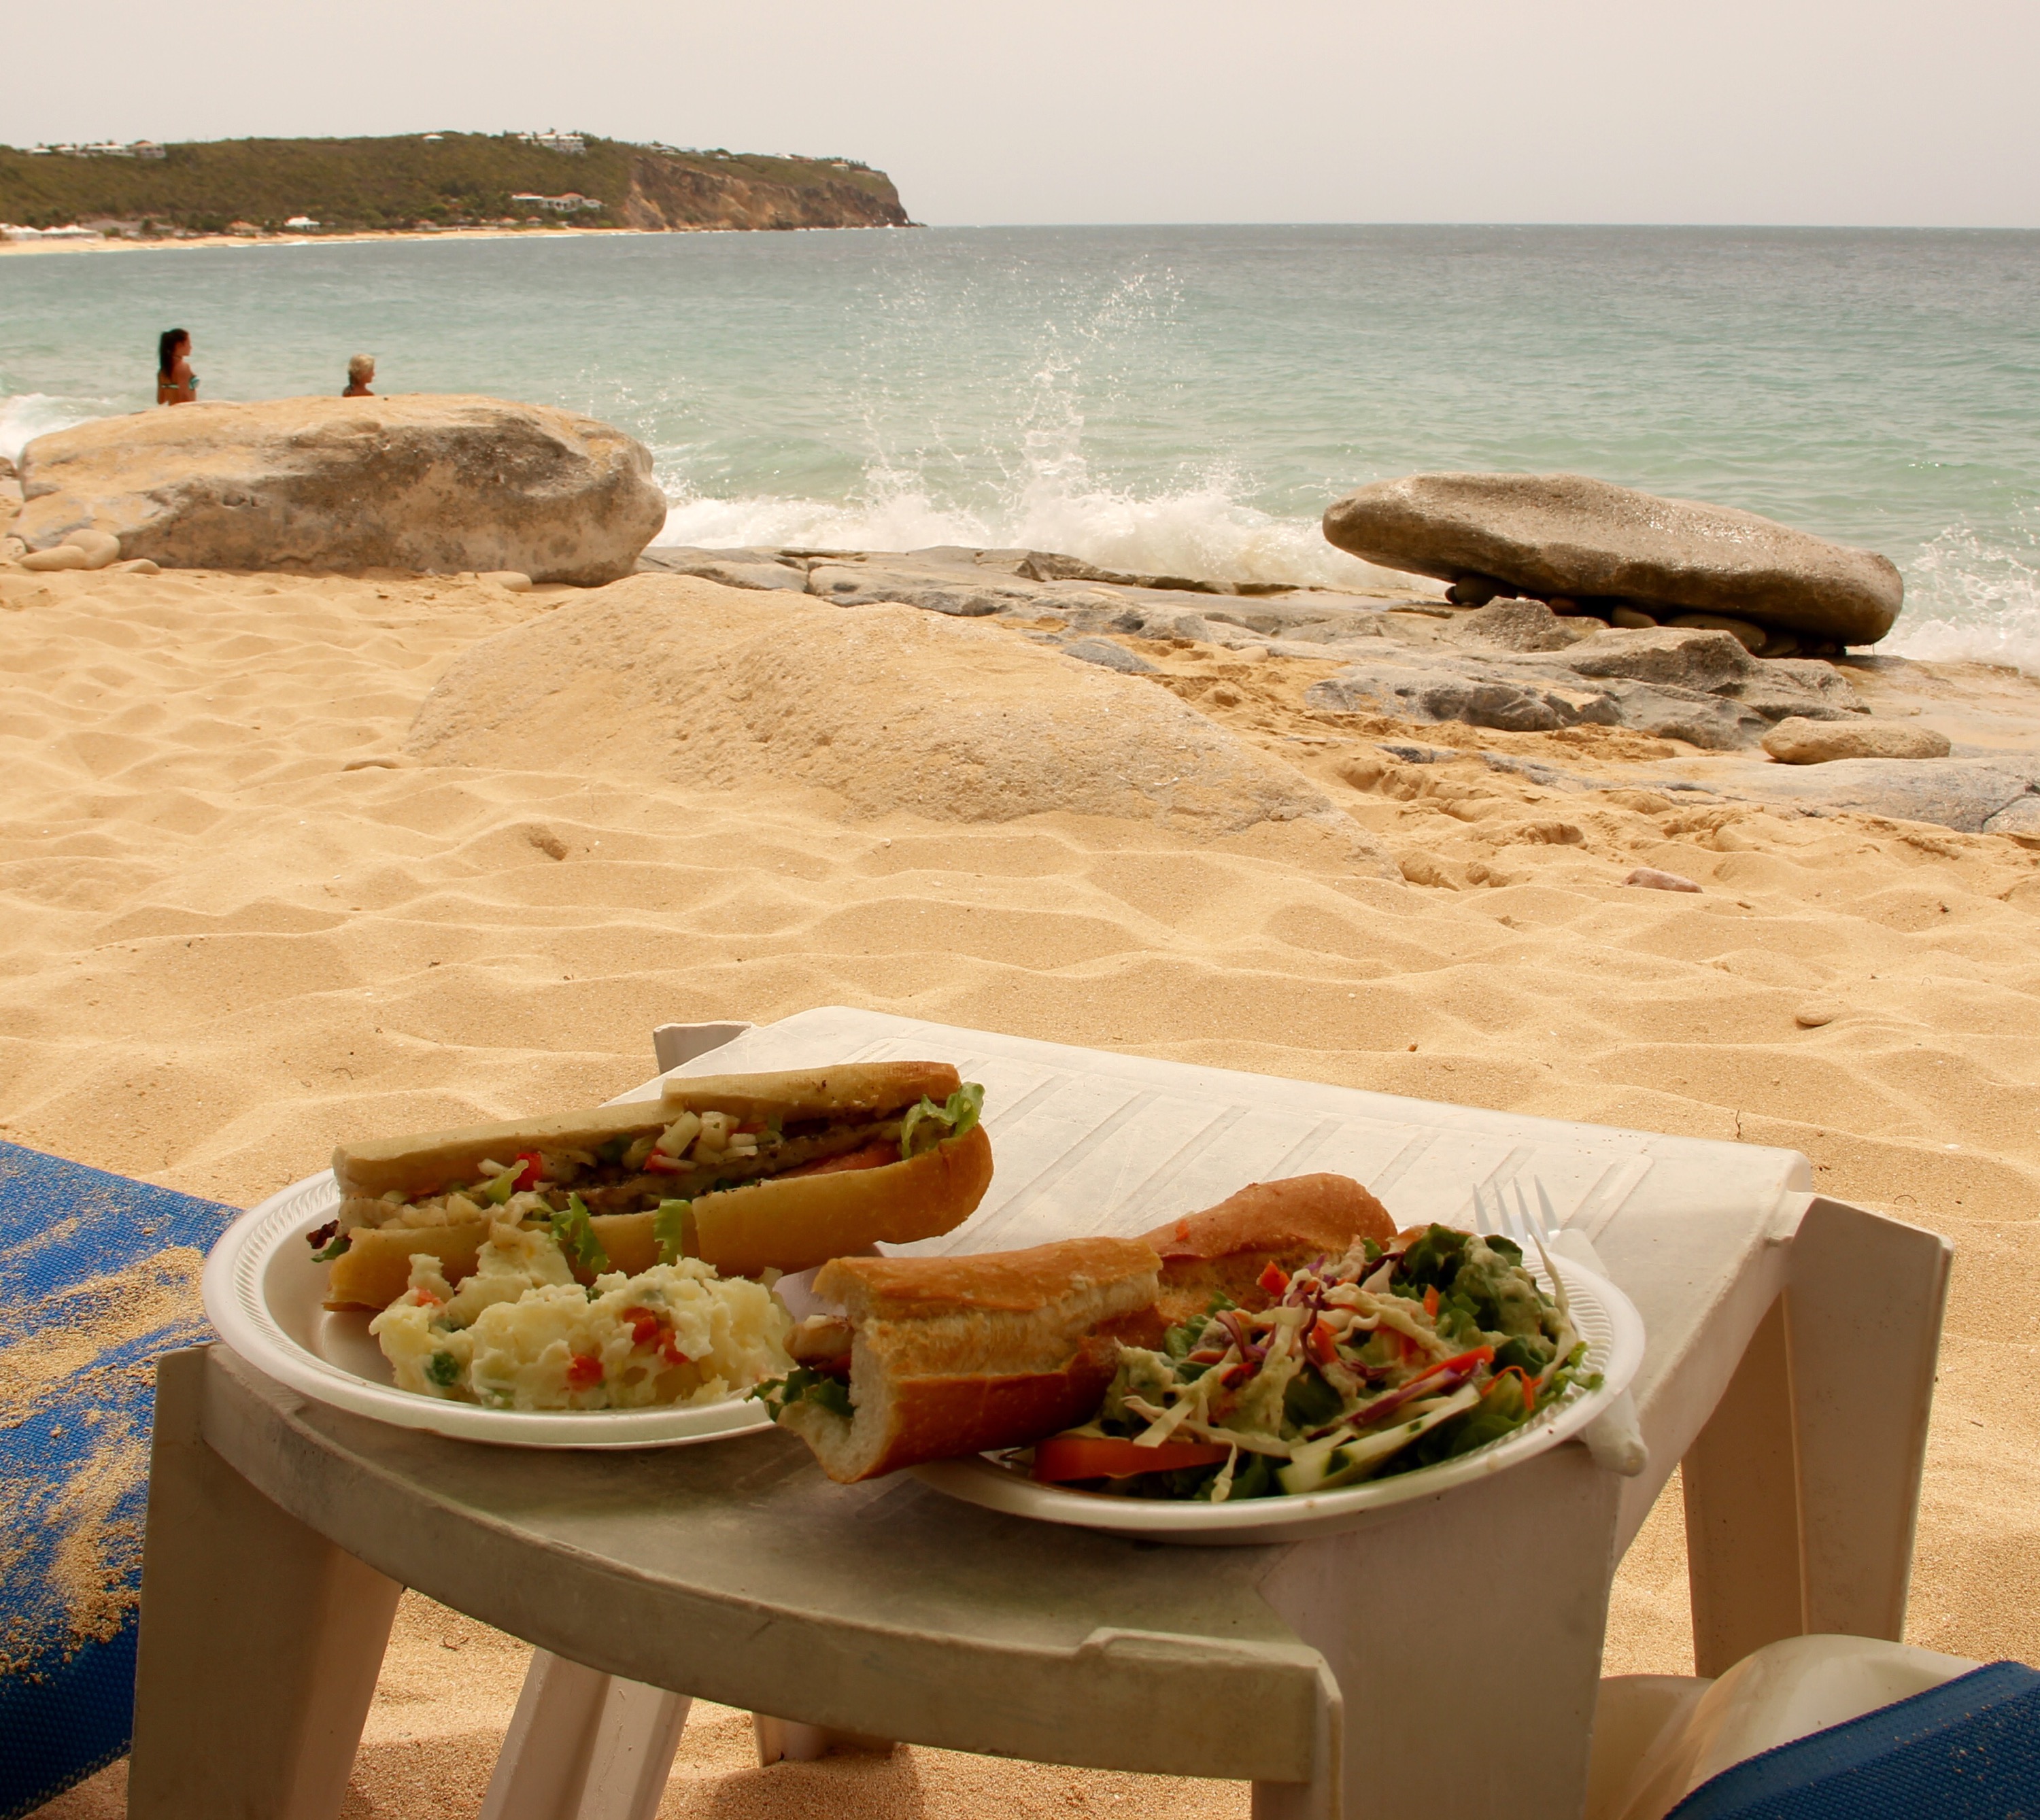
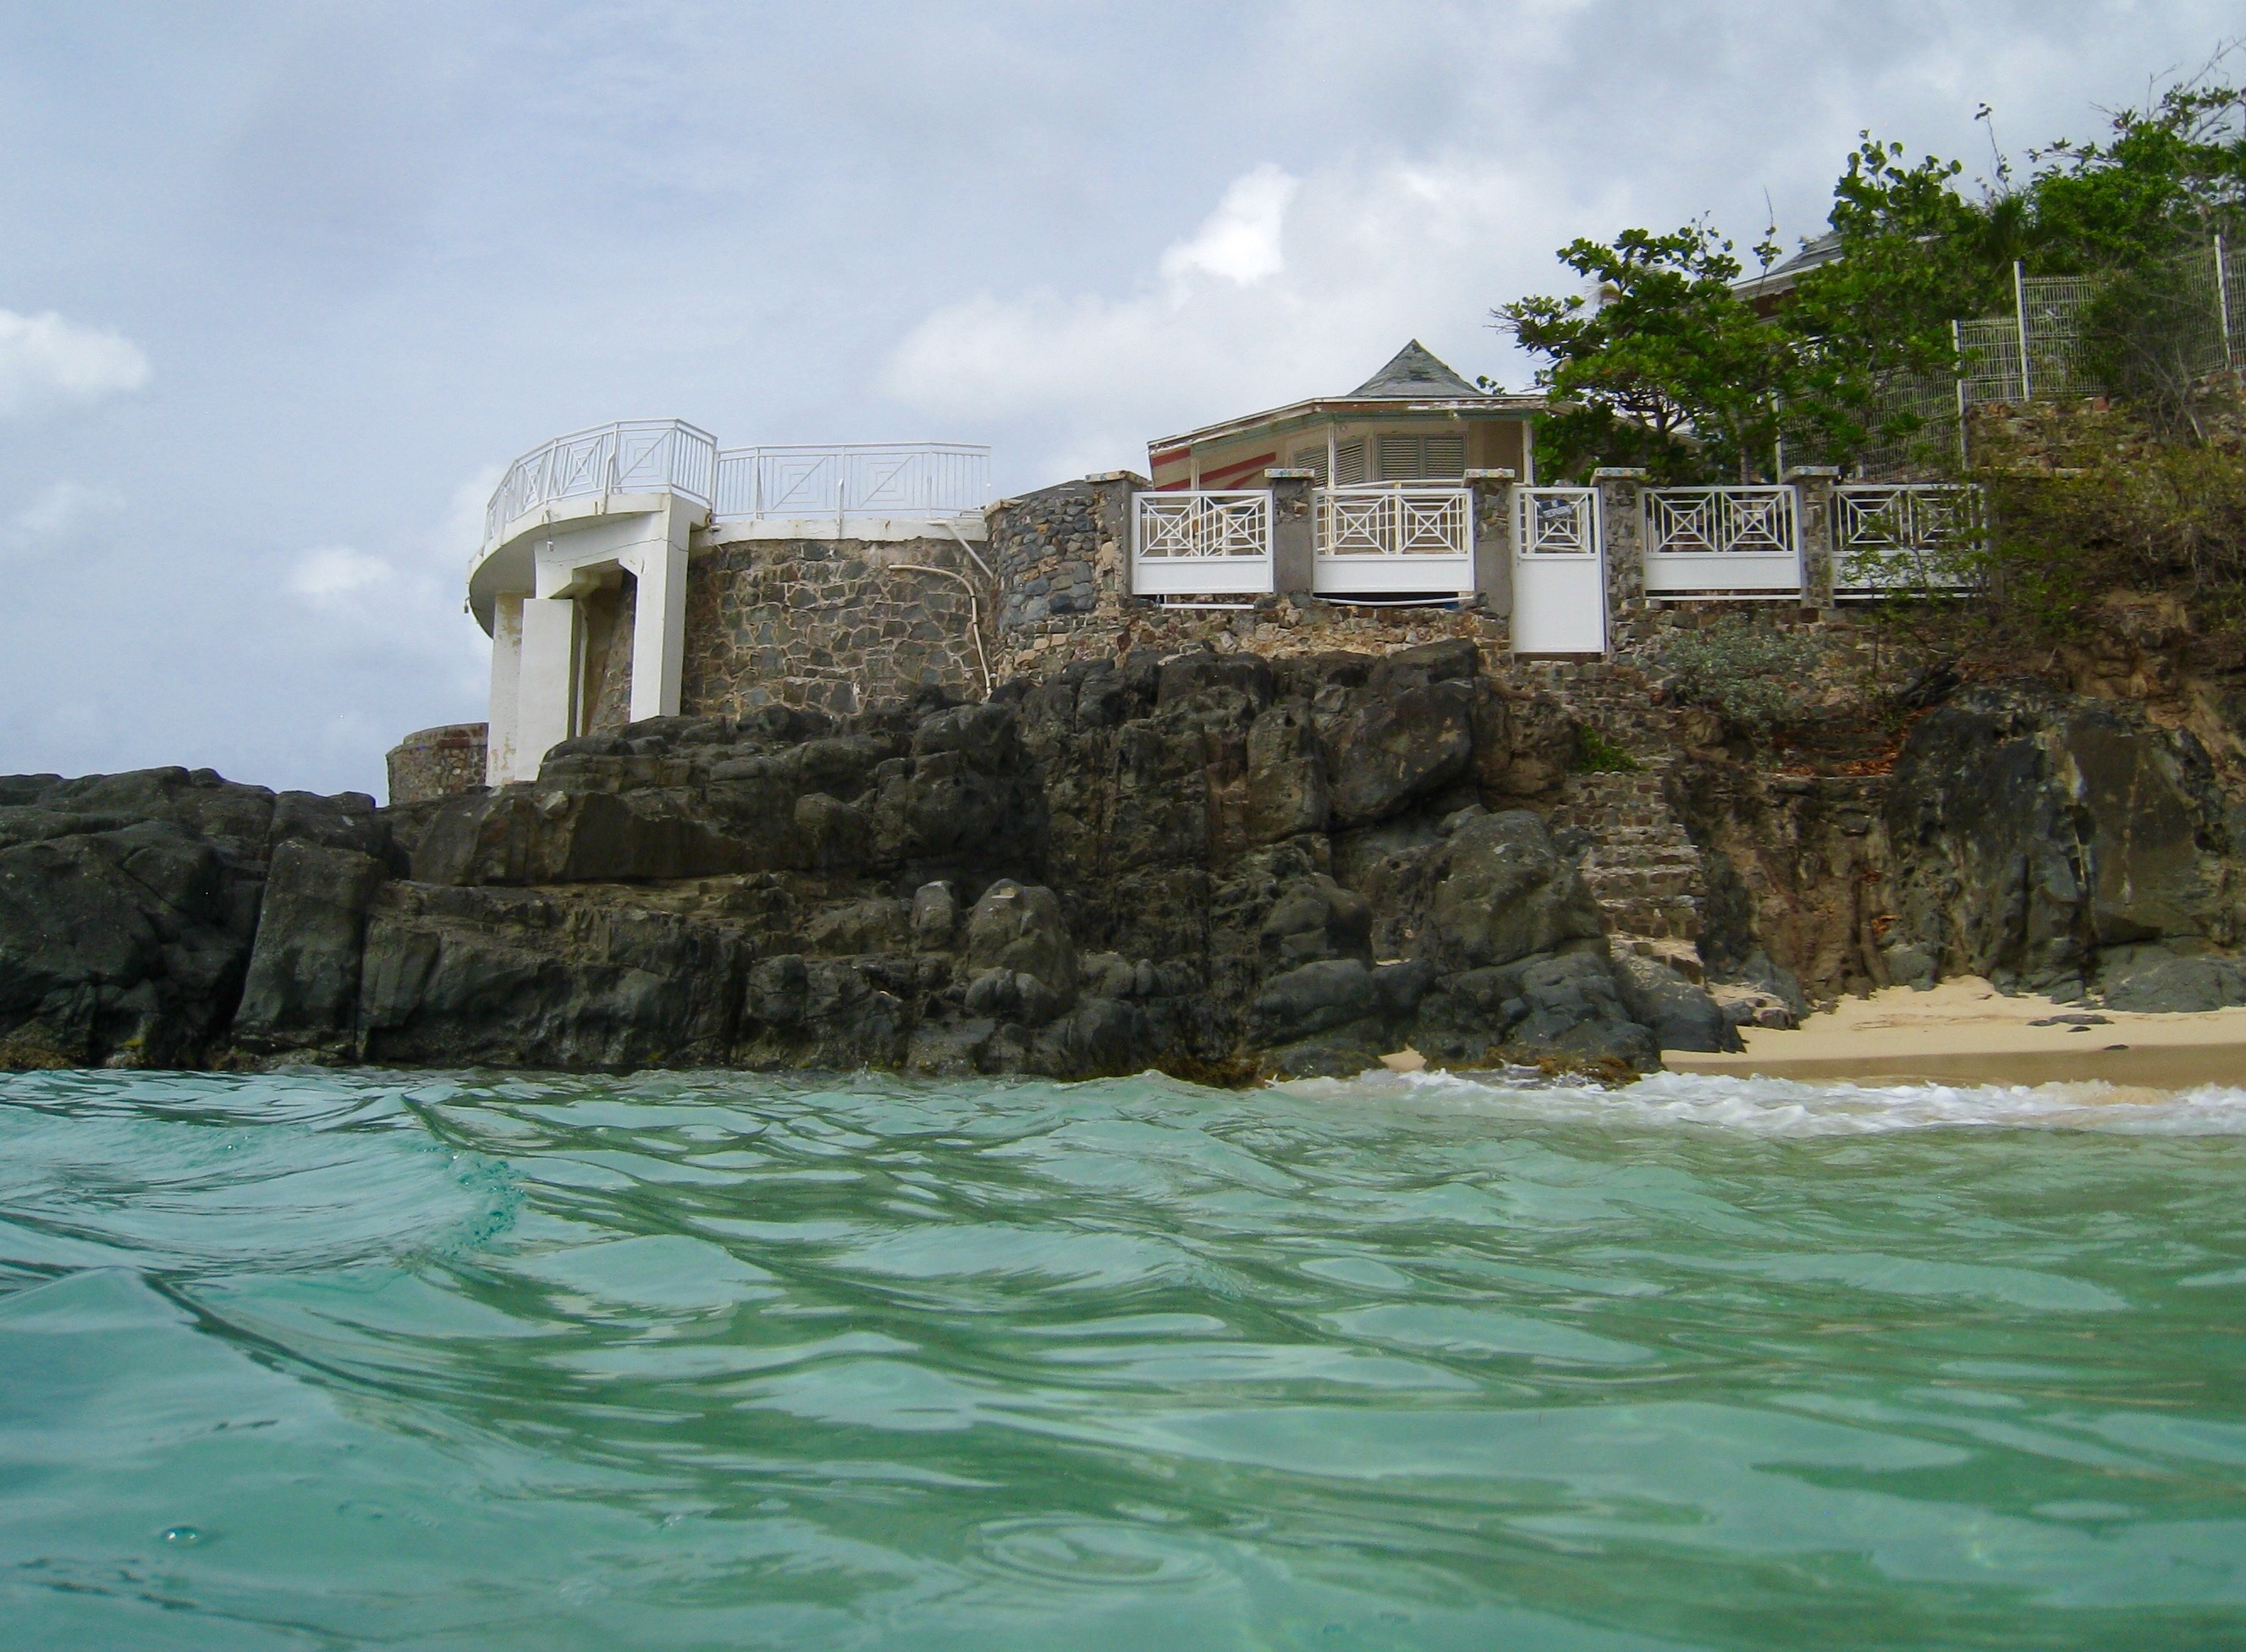
We snorkeled around a rock outcropping that had a residence that seemed abandoned. 

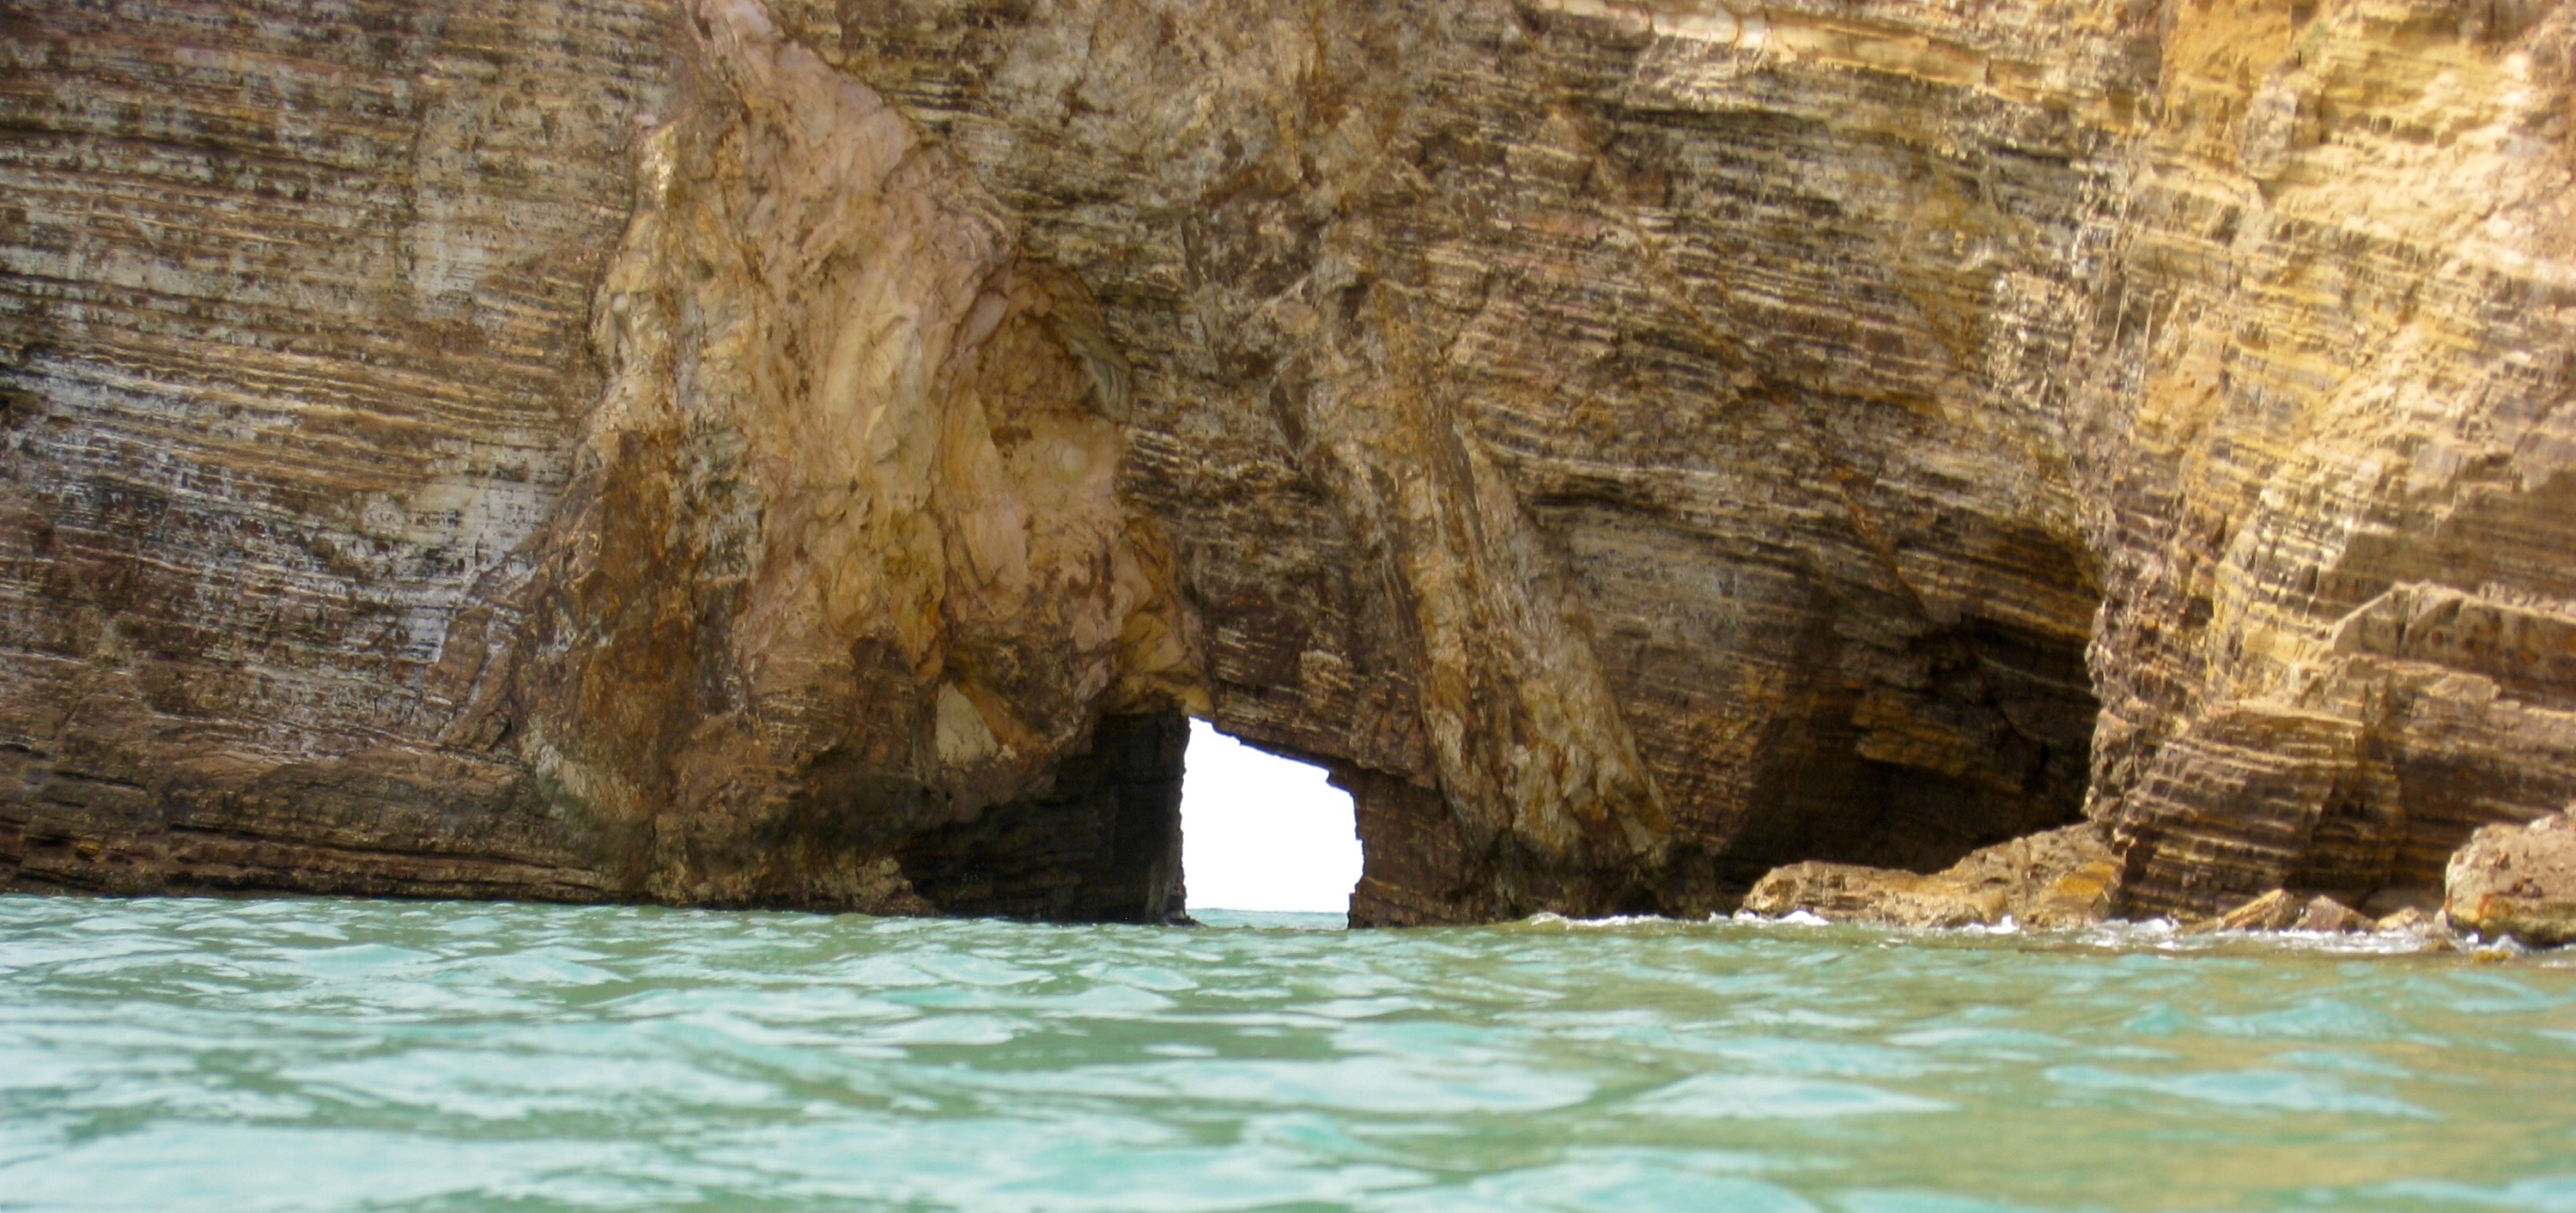
   On the other side we found a small little beach and a swim through rock cave that we didn’t actually swim through because the tide was a bit too low at the time.


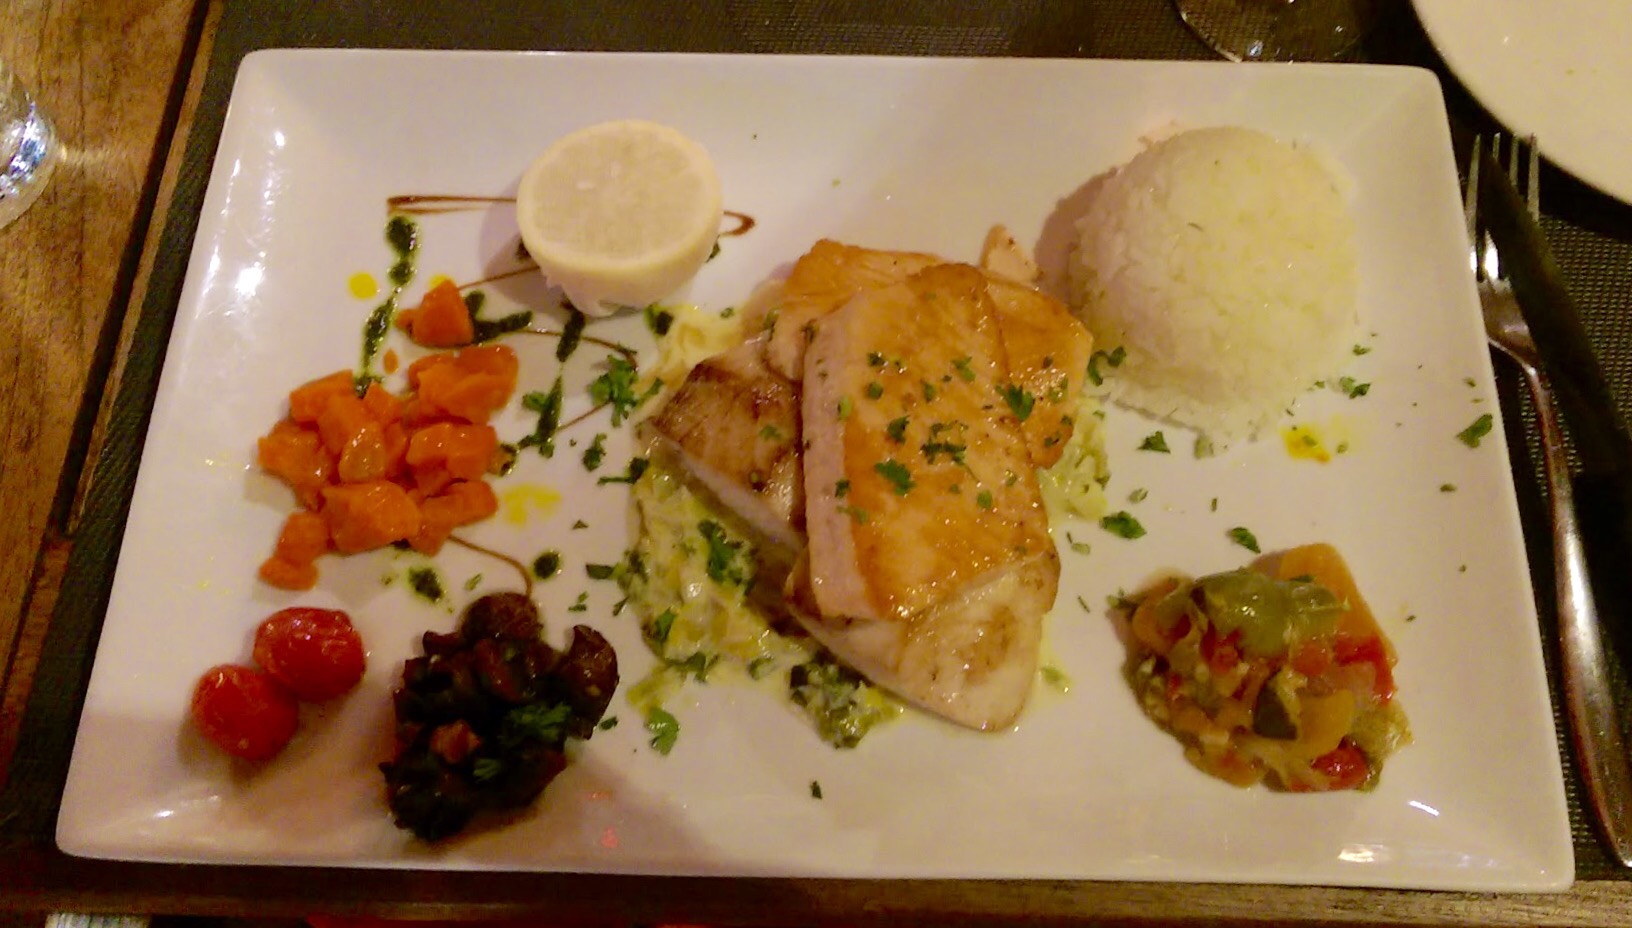
For dinner we headed back into Marigot’s La Marina Royale to La Belle Époque. The food was more reasonably priced then some places we’d been. It all was good, but the fish and steak were perhaps a bit over cooked.
 My starter salad was enormous. 

My dinner had both Mahi Mahi and Salmon. 
  

Carl had steak.  

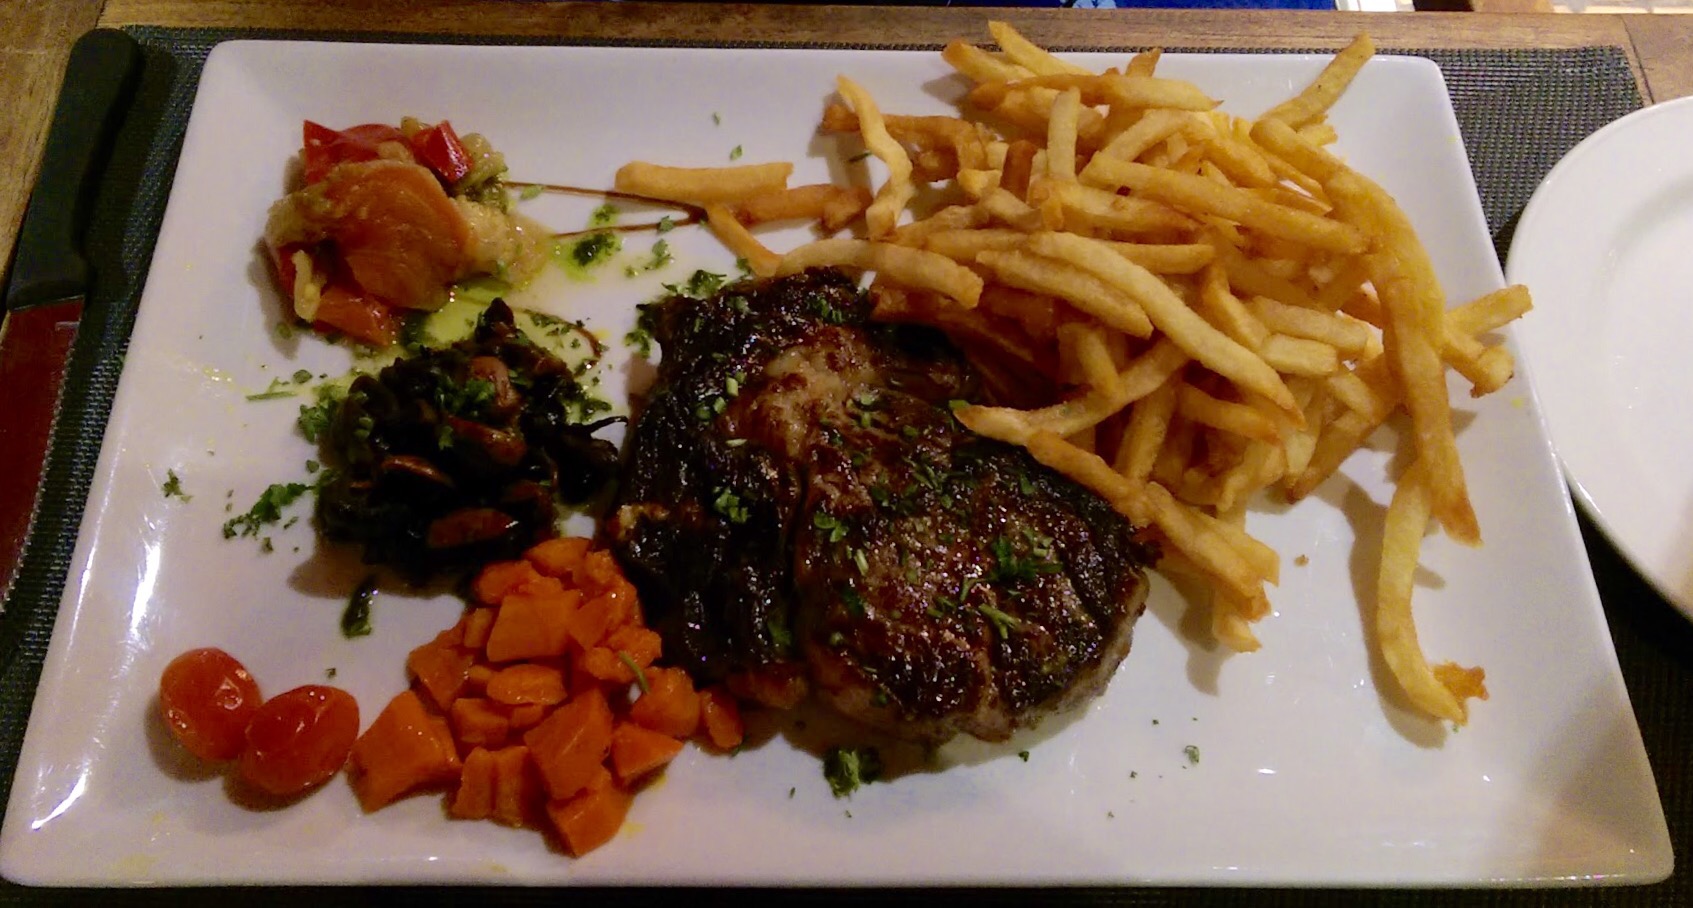
We finished with a delicious and large serving of creme brûlée.


Making no knead bread

I recently stumbled across this recipe from five years ago, published in the New York Times about how to make bread without kneading. And it includes yeast. I had never made bread with yeast other than in a bread maker before and I was anxious to try this method after getting a dutch oven as a gift.

My new dutch oven is 3 quarts and the recipe makes reference to a 6 to 8 quart dutch oven so I decided to try to divide the recipe in half. I tried this twice. The first time was a disaster after just halving the ingredients exactly. The second time I used more yeast and more water and had better results. However, I decided that it would be better with actual bread flour instead of whole wheat flour and that I should use fresh yeast. After getting the new ingredients I went straight for the whole batch the first try. Huge difference! The 3 quart dutch oven worked just fine. I also only let the dough sit for about 6 hours instead of 12 before kneading it just a bit and letting it rise for about 3 hours instead of 2. It was hard to work the bread’s schedule into my schedule this weekend.

Initial dough – it’s a bit shaggy:

After kneading into a round shape and allowing to rise under a cotton towel (in a bowl so that the dough rises up instead of flat):

After baking, the bread is beautifully crusty:

The crust is quite thick, but after wrapping in foil and refrigerating the loaf, it wasn’t quite so hard. Just out of the oven:

You can see the bread is light and fluffy inside. Very chewy and quite delicious especially when toasted:

I definitely plan to make this again! Probably will try adding some herbs like rosemary or thyme sometime soon.

Enhanced by Zemanta

Edamame hummus, a delicious color of green

The thing I like best about edamame hummus (or spread if you insist hummus is only made of chick peas) is its beautiful light green color. OK, really what I like best is the taste but the color is a close second, especially since my kitchen is basically painted the same color. It’s also seriously easy to make since I don’t add any extra flavoring.

Ingredient list:

  • Frozen edamame
  • Olive oil
  • Plain yogurt
  • Garlic cloves
  • Squeeze of lemon
  • Sea or kosher salt
  • Herbs to taste (I used parsley and thyme)

Instructions:

Cook edamame according to instructions. I buy the kind that steams in the bag in the microwave. Add the entire bag (or less if you want to use edamame for something else) to your food processor. Also add minced garlic – I used 3 big cloves, which is pretty garlic-y, juice from a quarter of a lemon, a drizzle of olive oil, salt and herbs to taste. Add about 3 dollops of yogurt and turn on the food processor for about a minute. Check the hummus. Continue to add yogurt and run the food processor until you reach the desired consistency.

Before processing:

After processing – yum!

Enhanced by Zemanta

Tonight’s hummus was made with edamame instead of chickpeas

Tonight’s hummus was made with edamame instead of chickpeas. So it’s probably more like a sandwich spread / dip than hummus, but it’s still delicious! The ingredient list was frozen edamame (cooked in the microwave), a bit of olive oil, plain yogurt, two very large garlic cloves, kosher salt, thyme, and some crazy spice mixture I unearthed from the cupboard.

The end result is very green and very tasty.

Making Super Bowl Food!

As everyone remembers, yesterday was the Super Bowl. We hosted a party at our house. Unfortunately for me, my Steelers lost but it was a good game and it’s hard not to like the Green Bay Packers (well, except when they beat the Steelers, then it’s easier). Fortunately for me, our Super Bowl food was a hit! I prepared Kung Pao Tofu Sliders and my husband made pulled pork with pickled onion sliders. Both were quite delicious if I say so myself.

Making Kung Pao Sliders

The recipe from the latest issue of the Vegetarian Times magazine. The sliders are made of marinated and baked tofu squares and a carrot and zucchini slaw.

First, I spent way too much time julienning carrots and zucchini. I wonder if it would have been okay to shred the veggies with my food processor instead.

Then they were mixed with the crazy dressing that had soy sauce, sesame oil, peanut butter, mayo, natural cane sugar, garlic, cayenne powder and probably other things I can’t remember. The slaw chilled overnight.

On Sunday, I cut up two packages of extra firm tofu into small squares.

It was marinated in soy sauce, sesame oil and sugar.

It was then baked for 25 minutes on each side. After that, assembling it with the slaw and bun proved it was absolutely delicious! You can see the pulled pork slider in the picture as well.

Slider buns are tad tricky to find, so we used “brown-n-serve” rolls from HEB, our grocery store. They were cheap and perfectly sized!  And now we have them left over for dinner for most of the week, yum 🙂

Smoky beet cakes – a lucky new years food!

Link: Smoky beet cakes – a lucky new years food!

On New Years day I like to make us foods that are considered lucky. For some reason I decided that beets were lucky without actually knowing if that’s true or not. Really I just wanted to make this beet cake recipe. It was fun because of the food processor and the fact that I got to turn my hands dark red by forming beet patties.

I only have a picture of them with the rest of the food from that day. They were quite tasty and would even make good veggie burger patties!