Sometime soon I’m going to share the details of our sitting room and dining room renovation, but for now I’m going to share the set of corner shelves I built. I call them rustic industrial because I left the wood in it’s raw state and I used black metal pipes spray painted oil rubbed bronze as support for the shelves, in the same style as the rustic industrial dog bed I built for my favorite pup. I wanted a set of corner shelves more substantial then the set I had for many years, about 5 feet tall with 5 small shelves in a light oak color. After I sketched out my idea for the new shelves, it took me about a month to find enough time to finish the job.
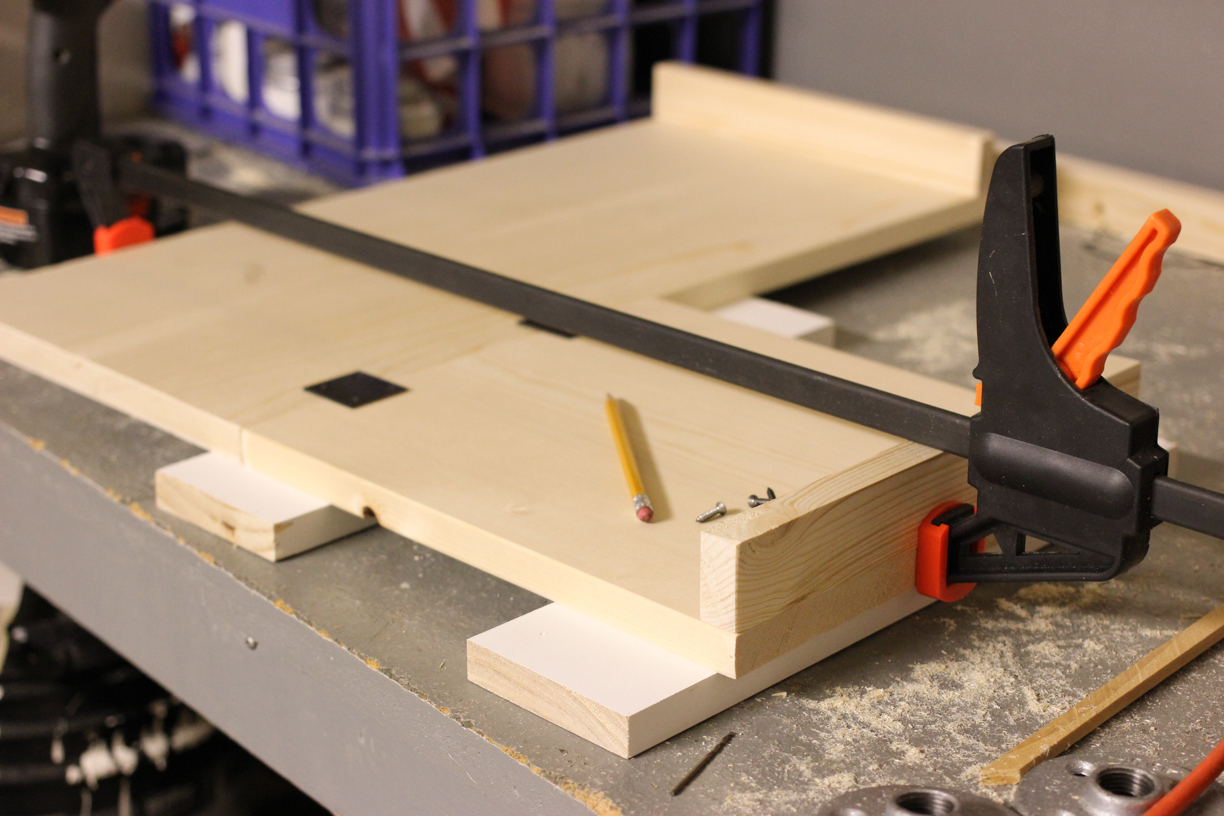
I used 12″ wide pine boards. I cut 6 sections of one foot and two feet long each so that I could attach the sections together to make corner shelves. This isn’t where I actually cut the boards, but I did use that table saw. I just thought you might enjoy my dog photobombing my picture, like she always does.

In order to attach the metal pipe to the side of the shelf, I used a 1″ x 2″ pine board to support the shelf. To attach the support board to the shelf, I used a counter sink bit to drill through both boards.

Counter sink bits:

Close up of the countersunk screw. Before I stained the wood, I used wood filler to fill the hole.

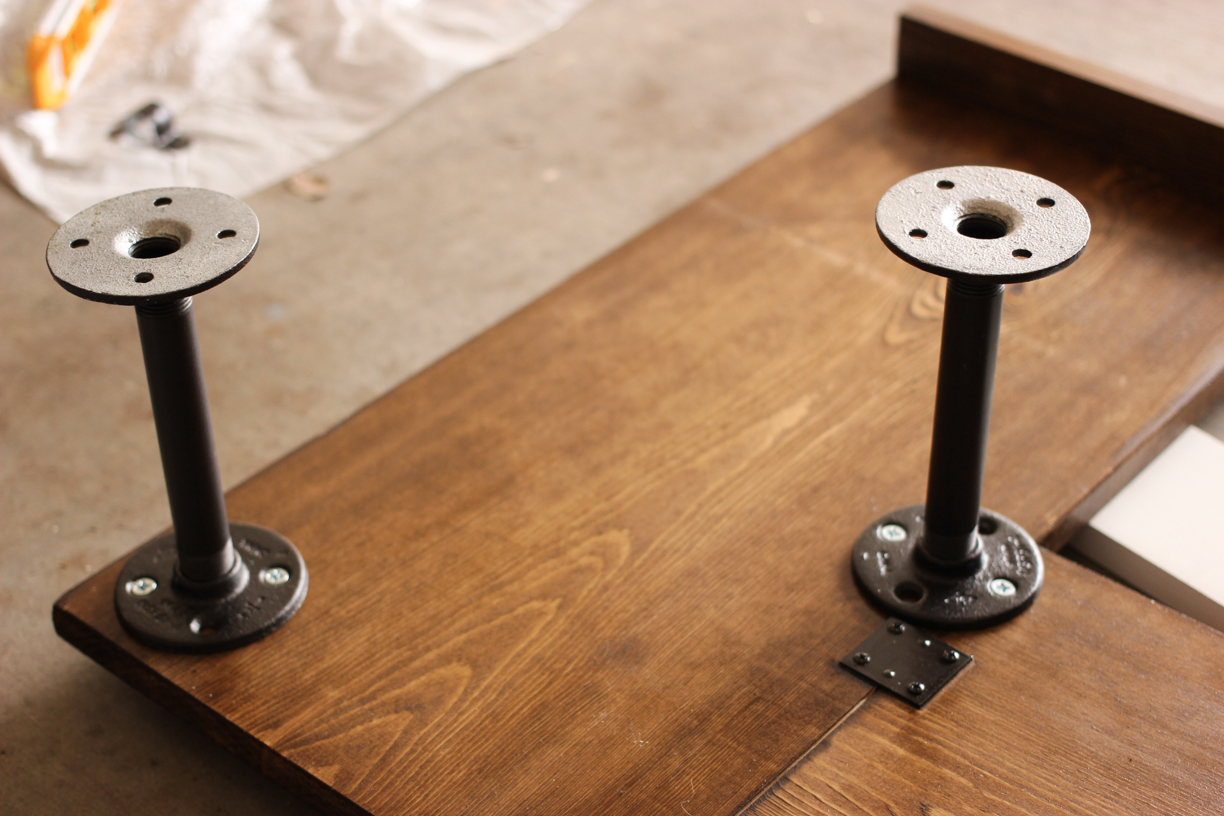
After I attached the support board to all of the shelf pieces, it was time to attach the one foot and two foot boards together, but first I had to plan the supports for the bottom shelf so that all of the brackets would fit. I spray painted the hardware with oil rubbed bronze.

To attach the one foot and two foot sections together, I used wood glue and a clamp before putting the screws into the brackets.
After the shelves were assembled, I stained them with TimberSoy Walnut stain and then finished them with quick drying polyurethane. While being watched by my dog.

Attaching supports to the bottom shelf (6″ black metal pipes and floor flanges):
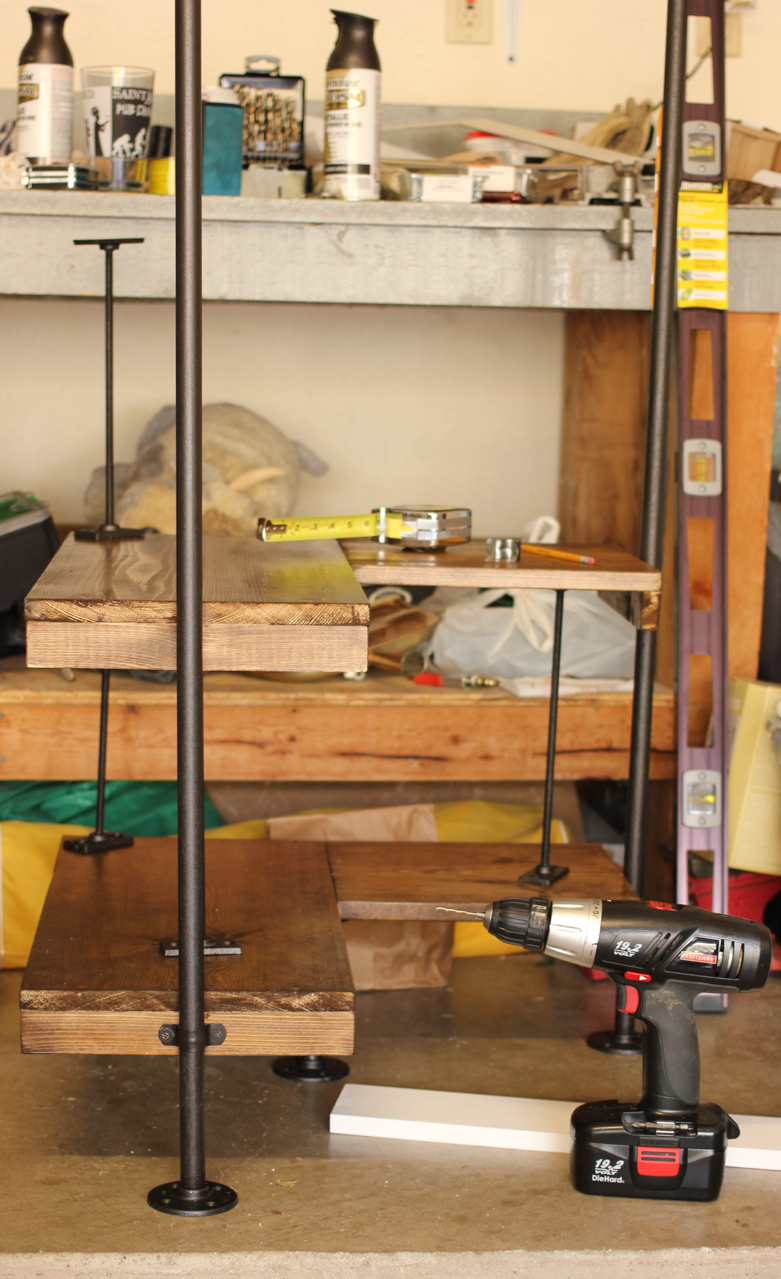
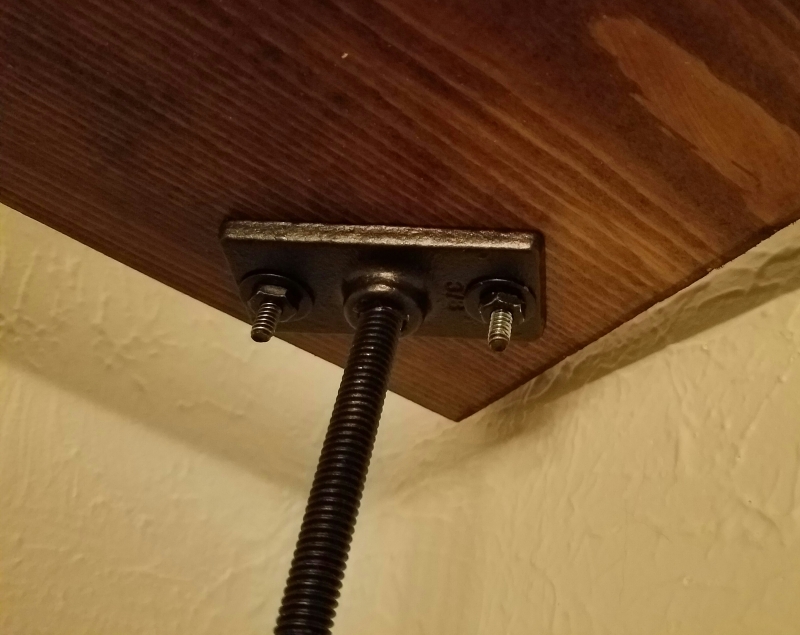
Try to ignore our very messy workbench in the background of this next picture. I assembled the shelf layer by layer, making sure that the shelves were level and that the brackets were attached in relatively the same place. it wasn’t the easiest task. The back corner was supported by threaded rods screwed into something called “ceiling flanges” that were all spray painted with oil rubbed bronze. I used some super glue to lock the threaded rods to the flanges so that they were all the same length. You can see the side supports which are 72″ black metal pipes spray painted oil rubbed bronze.
A close up of the bracket used in the back corner of the shelf for extra support:
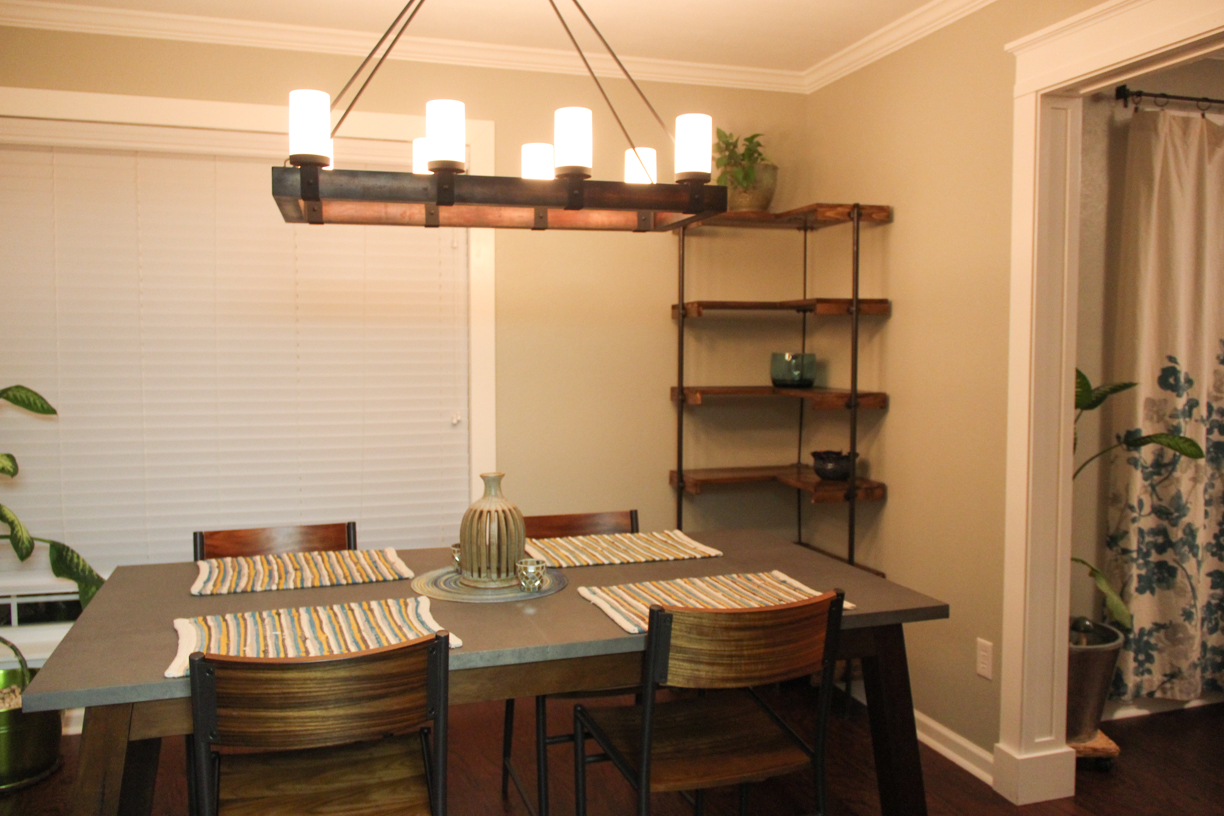
After the shelves were assembled, I put them in the dining room corner. And then took many photos of them for you to enjoy and to see how they fit in with the other furniture. I haven’t full accessorized the shelves yet.


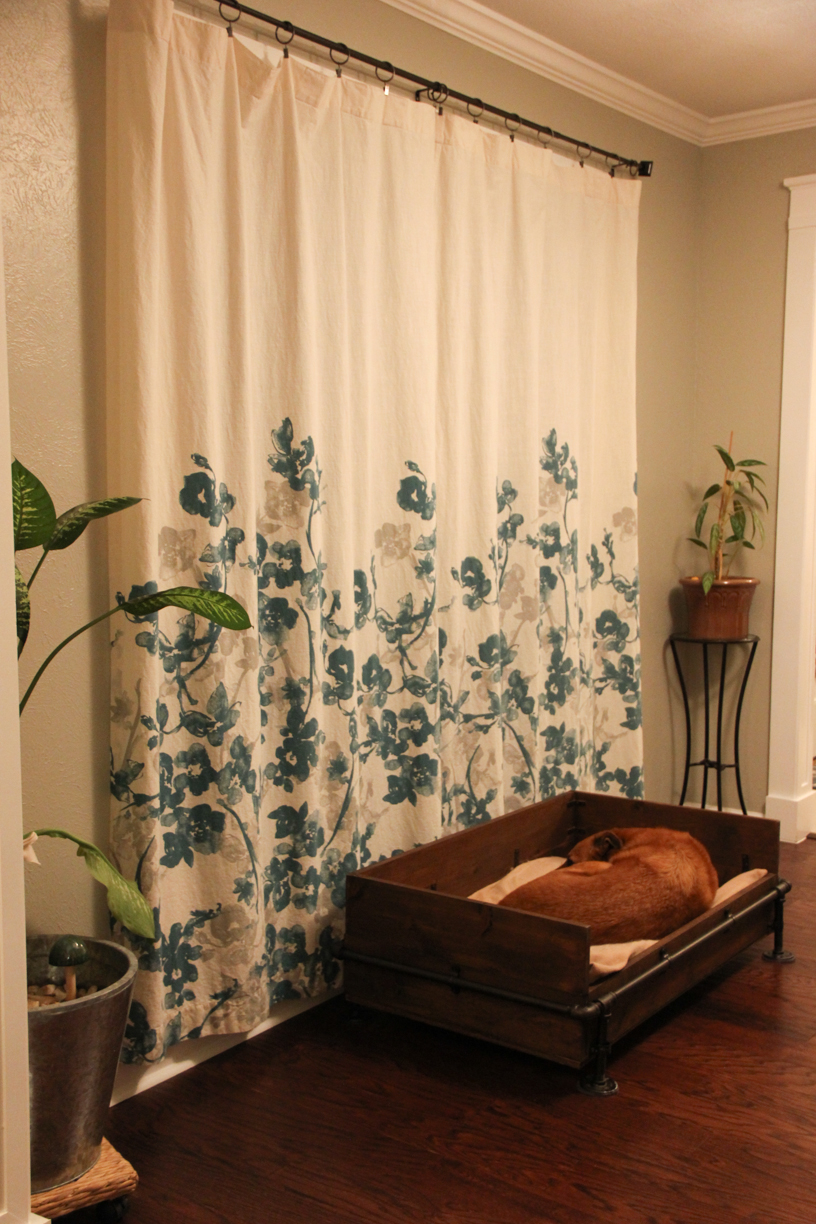
I took a photo of the dog bed next to the new curtains so you could compare them to the corner shelves and of course the dog chose to lay in her bed at that moment. She’s the best photo bomber 🙂